Scans
Scans are the result of scanning physical objects to create datasets, collections of RGB images and 3D point clouds that Pick[+] uses to configure AI models, build 3D models and define pick points for your application. In other words, each scan can capture the geometry and appearance of an object from the camera's perspective, providing the raw data needed for the rest of the application pipeline. See Data Generation for how scans relate to references and 3D models. A scan doesn't have to belong to a reference, this tab lists every scan, whether it's already linked to one or is still a standalone capture.
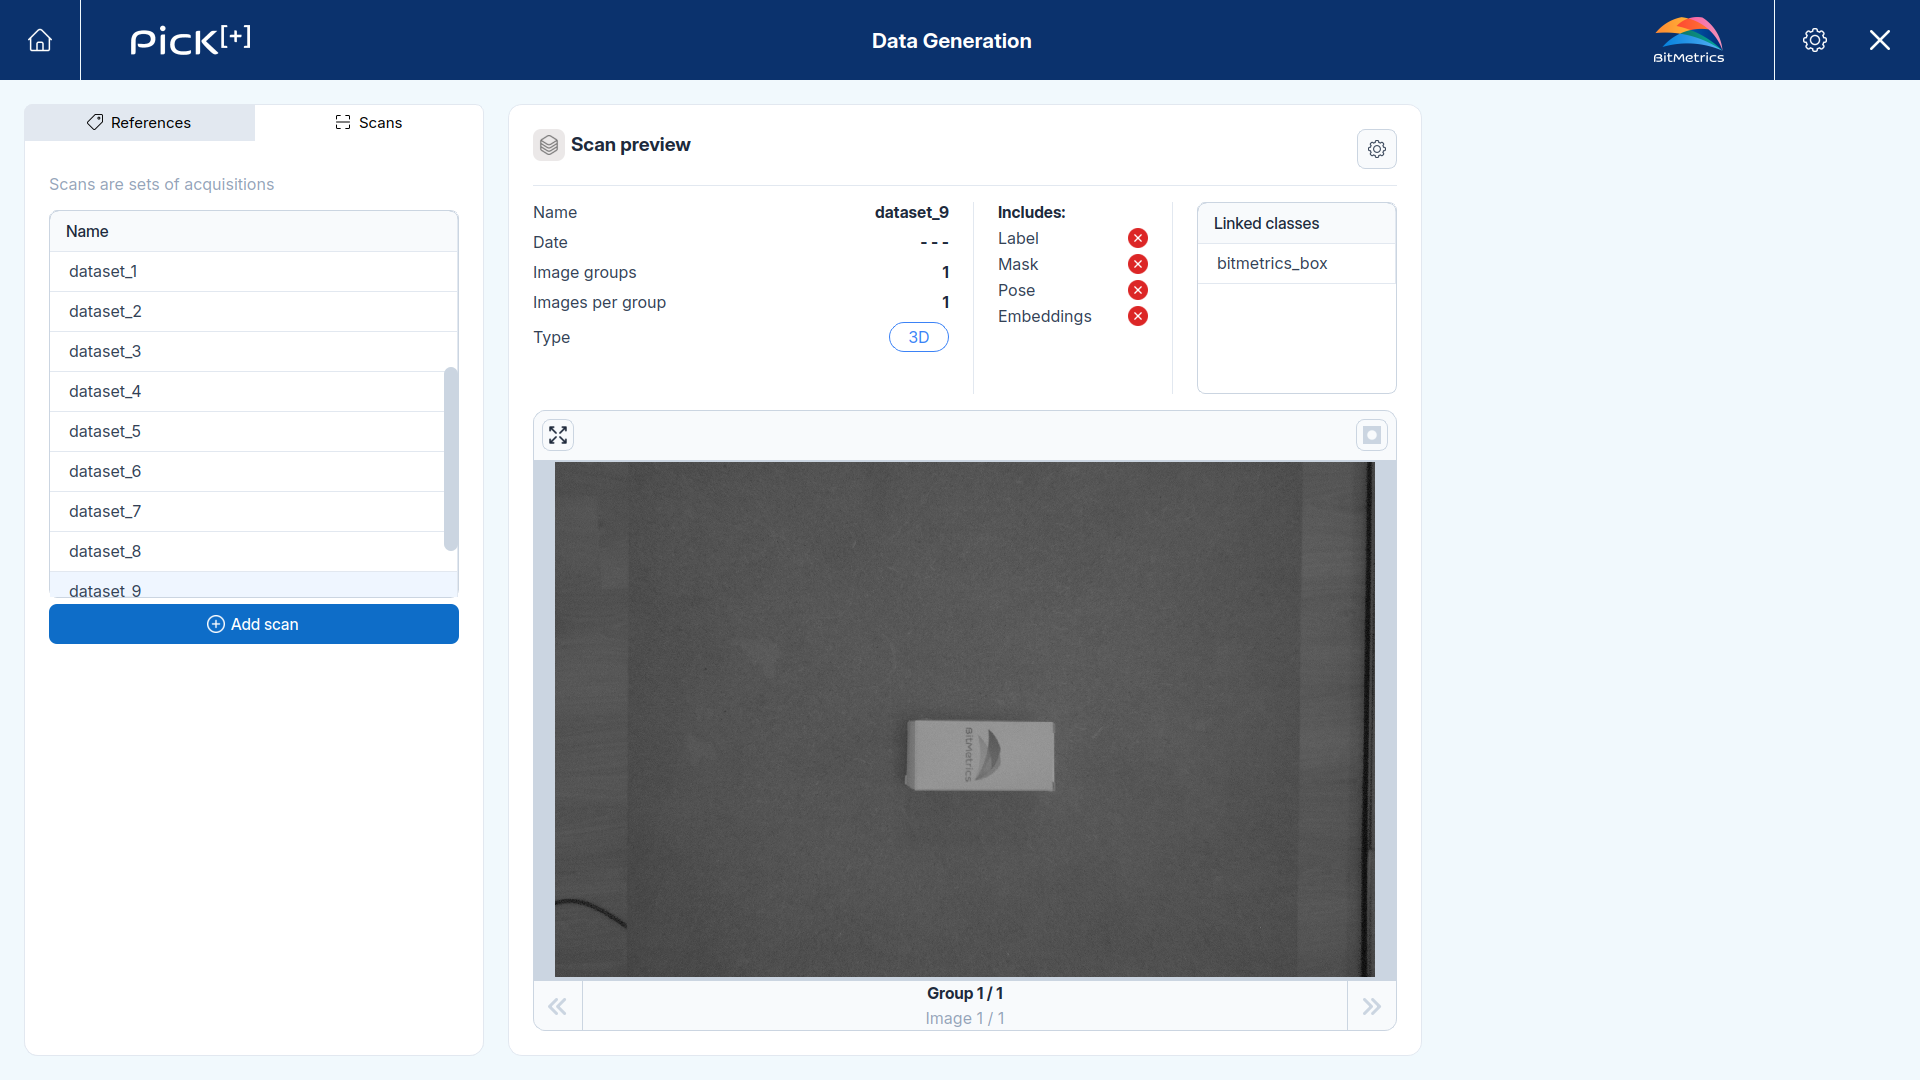
| Parameter | Description |
|---|---|
| Name | The scan's name |
| Date | The scan's capture date |
| Image groups | The number of camera image-sets in the scan, more than one only when the scan was captured with more than one camera |
| Images per group | The number of triggers captured within each group |
| Type | Whether the scan holds 2D or 3D data, see Scan for what each is used for |
| Linked classes | Lists the references this scan is linked to |
New Scan
Generating a new scan follows the same process whether it's for a reference or a standalone capture.
Before you begin
Make sure the following are in place before starting a scan:
- The camera is physically connected and recognized by the system
- The camera profile is configured with the appropriate parameters for your working distance
- The object can be placed within the camera's working distance
Scan Setup
Select the camera profile to use for the scan. The profile determines the camera settings applied during capture, so it needs to match the object's actual working distance for the scan to come out sharp and properly focused.
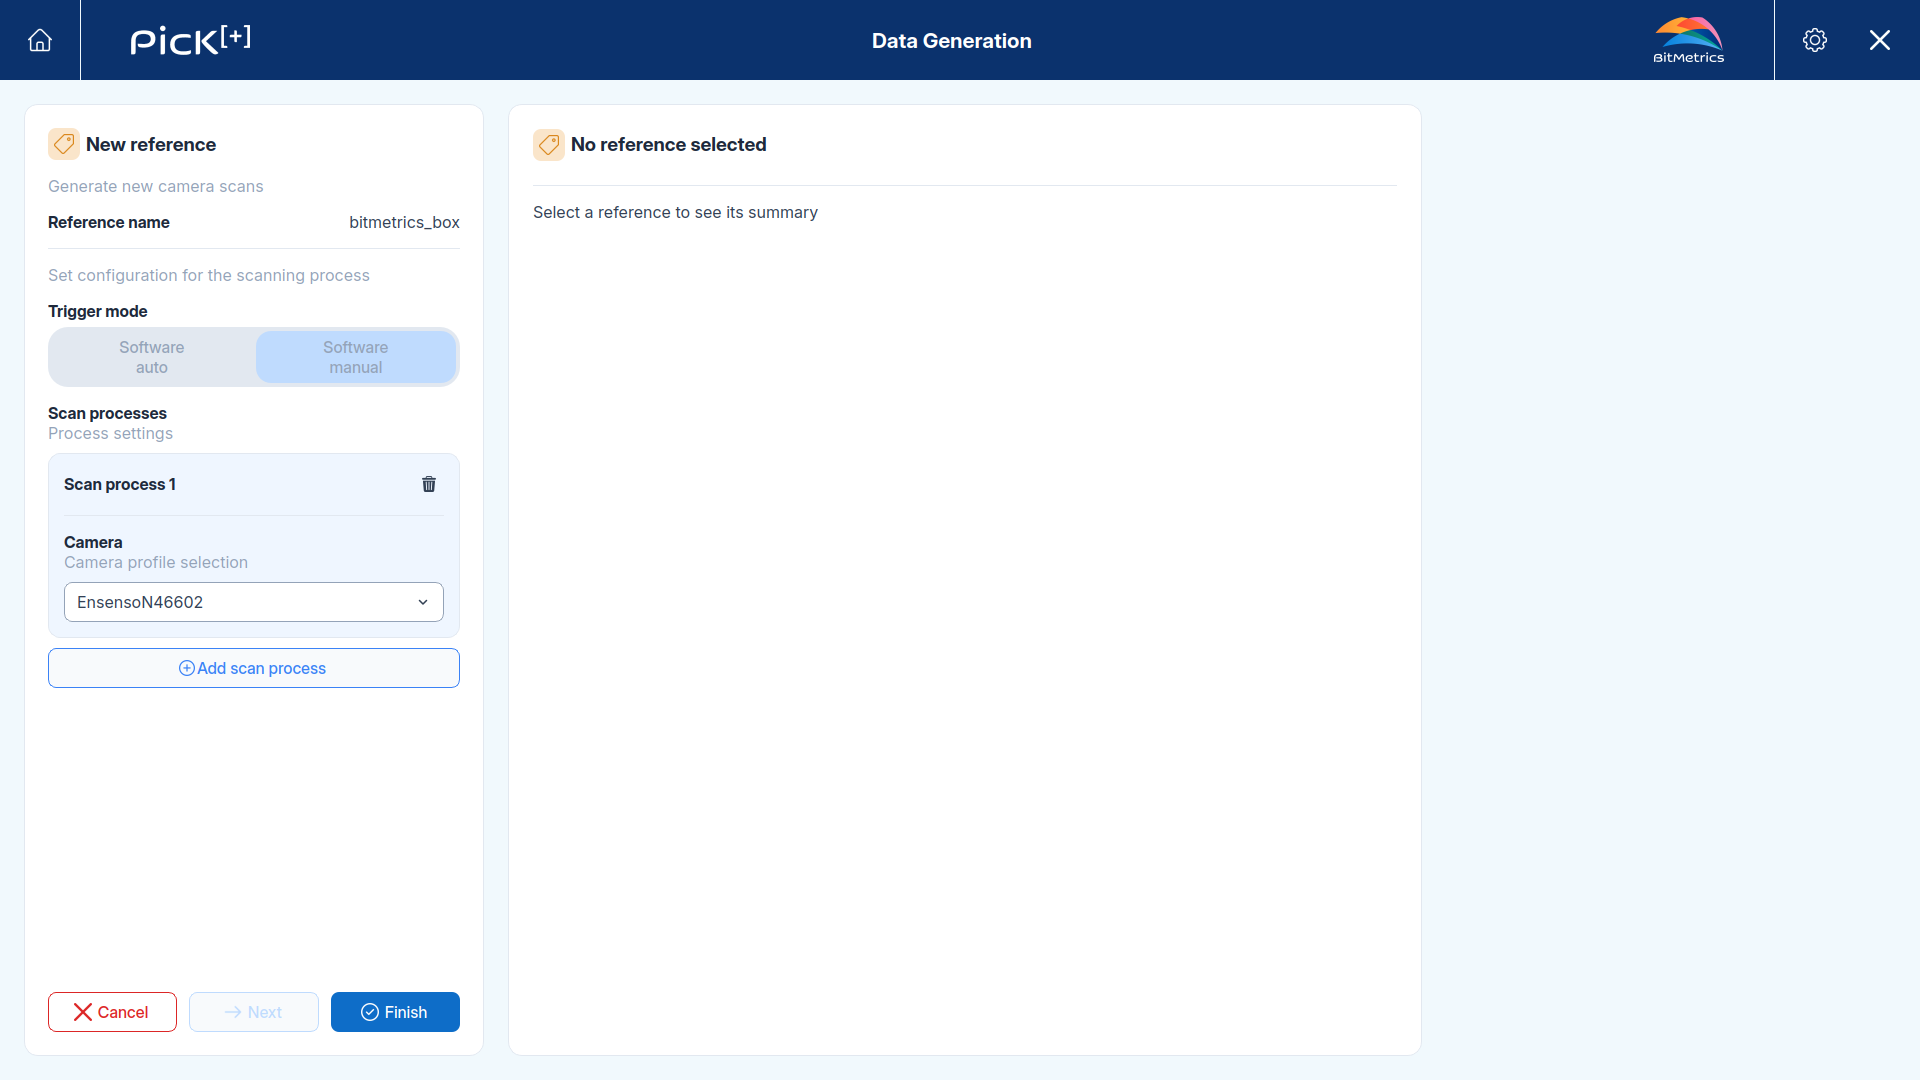
In setups with more than one camera, click Add scan process to capture with several cameras at once, each one producing its own separate scan.
Working distance
Each camera model has a minimum working distance that the object must respect during the scan. Check Camera Profiles to adjust the camera parameters for that distance.
Capturing the Scan
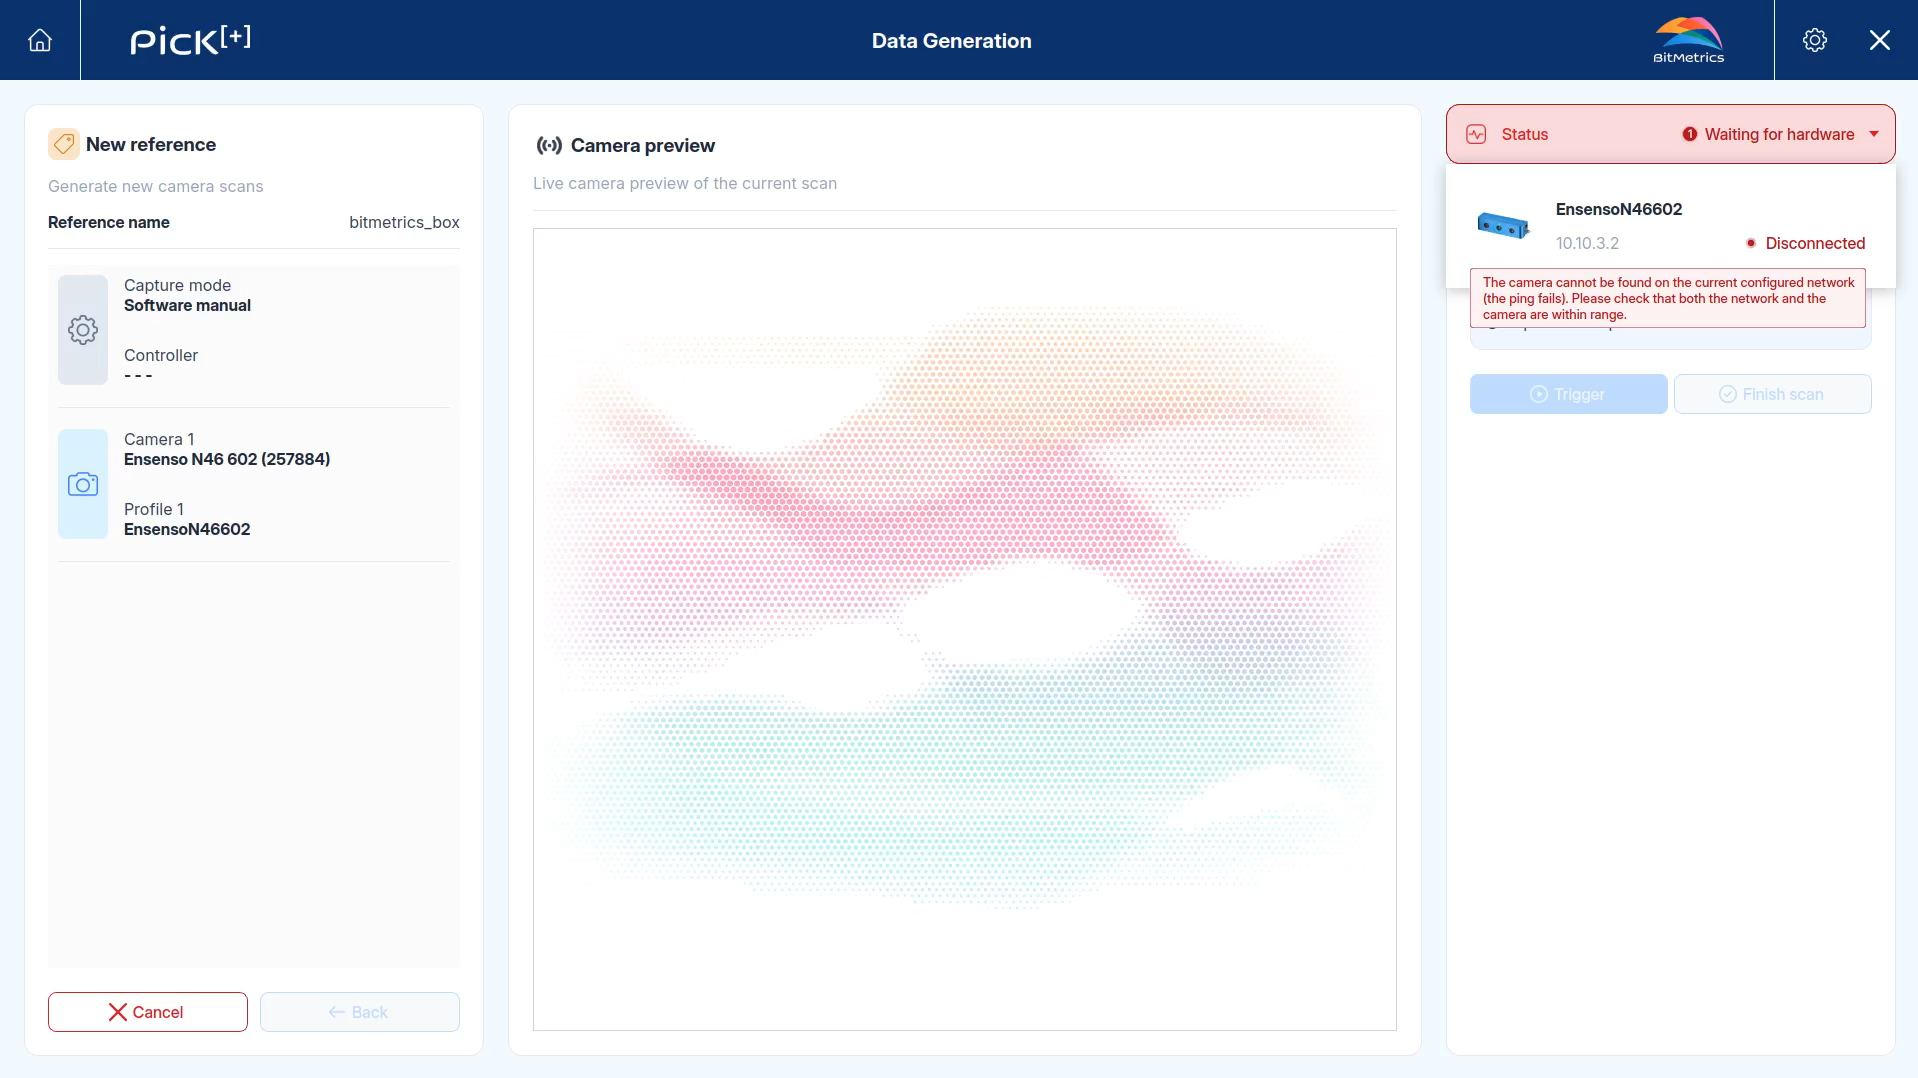
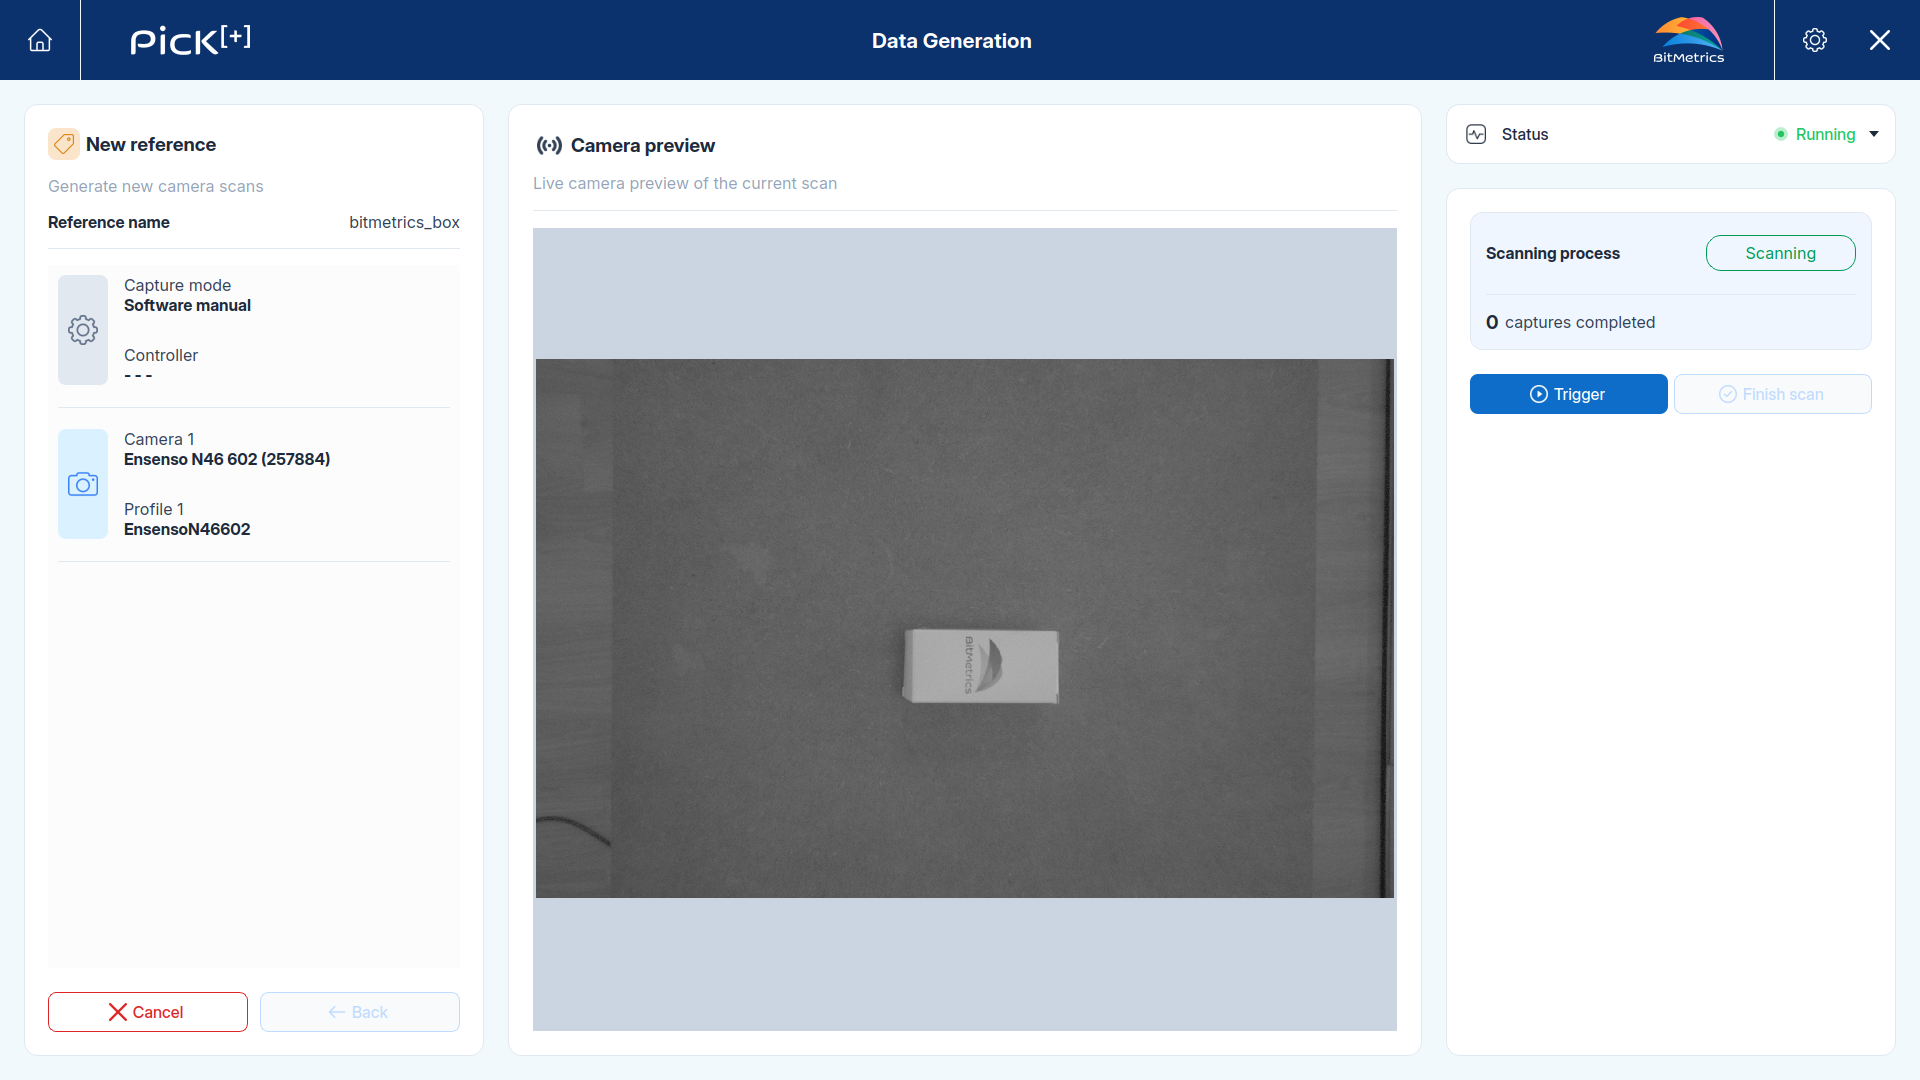
Check the hardware status panel on the right before scanning. If any device appears disconnected, check its physical connections and power. Once all hardware shows as connected, the scanning process activates and the camera viewer opens.
Before you trigger
- USE A CLEAN BACKGROUND, with NO ELEMENTS other than the object to scan
- Position the object within the camera's working distance, at the same distance it will have in the execution workspace
- Make sure there's enough contrast between the object and the background
- Center the object in the image
Once everything is ready, click Trigger to capture an image with the configured camera(s).
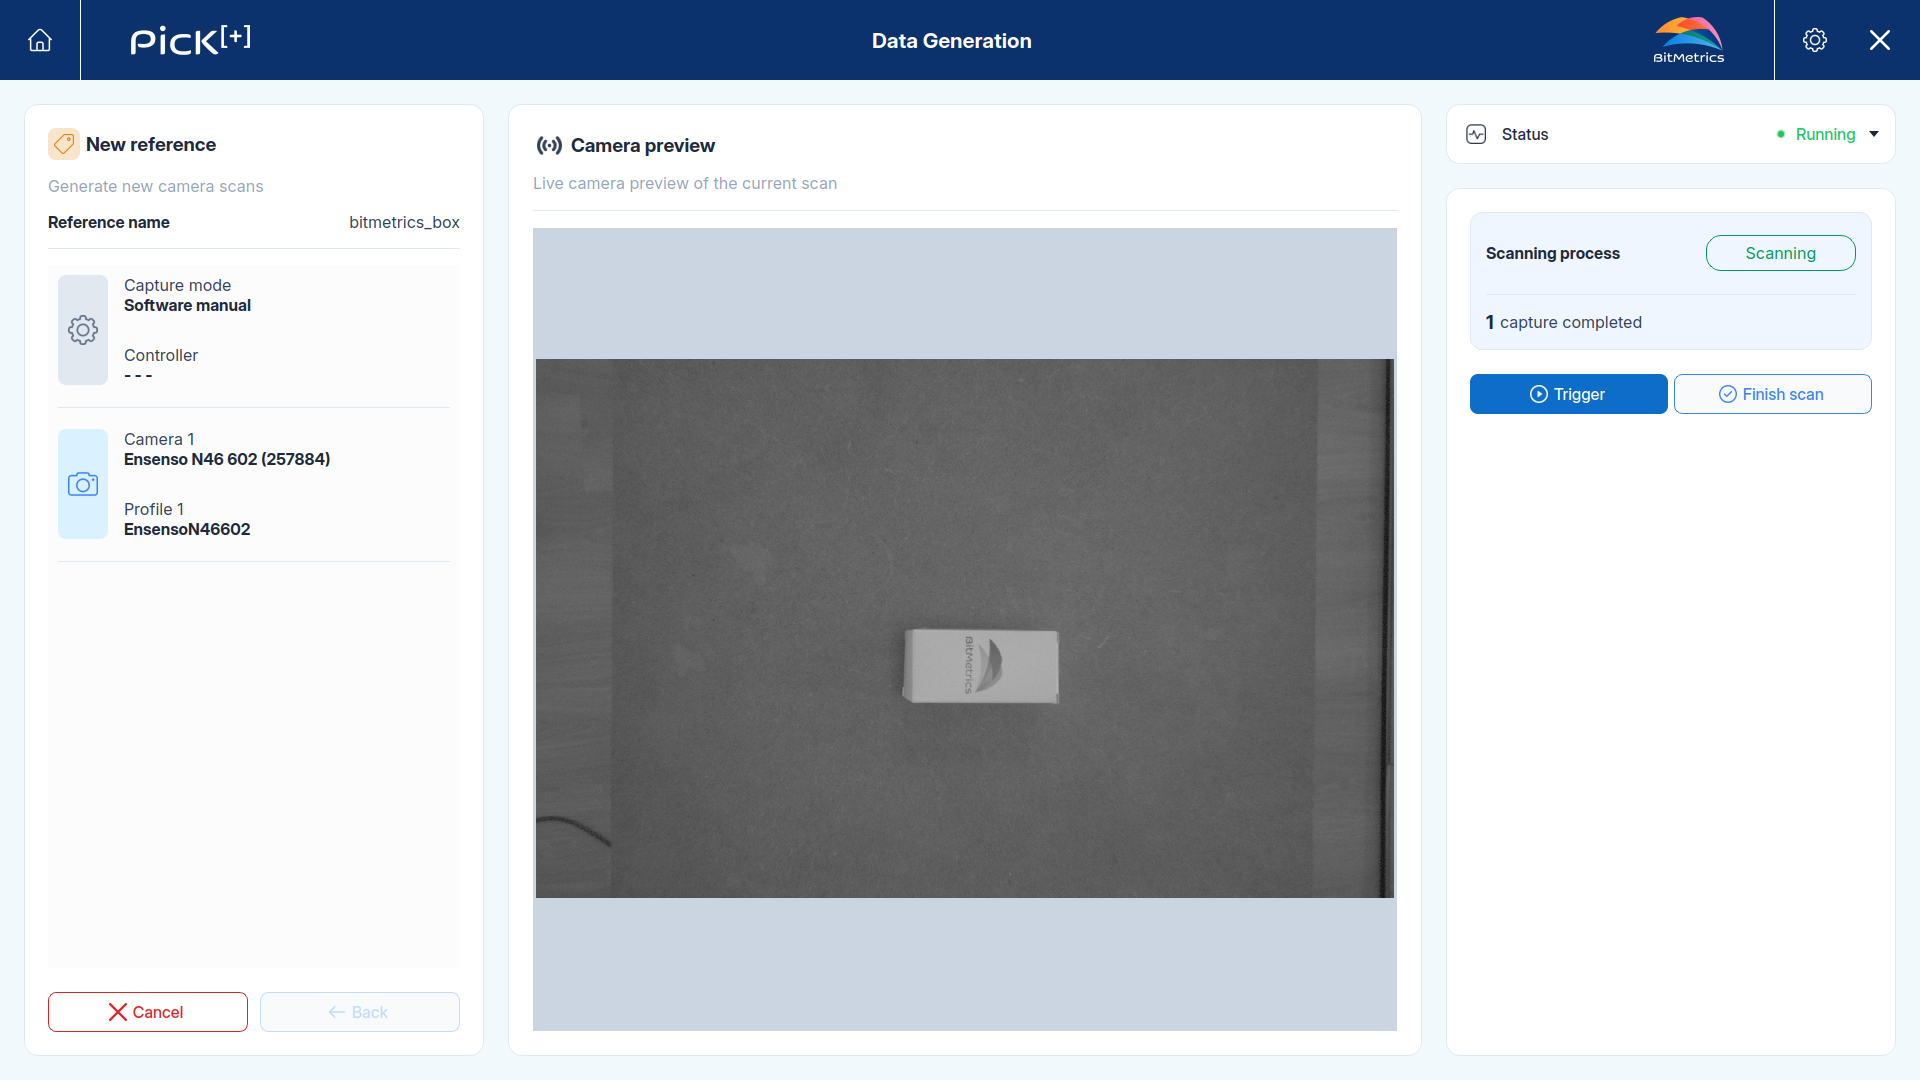
One trigger per face
For pick applications, trigger only once per scan. To capture more than one face of the object, reposition it and generate a new scan.
Once you're done capturing, click Finish scan.
Annotations
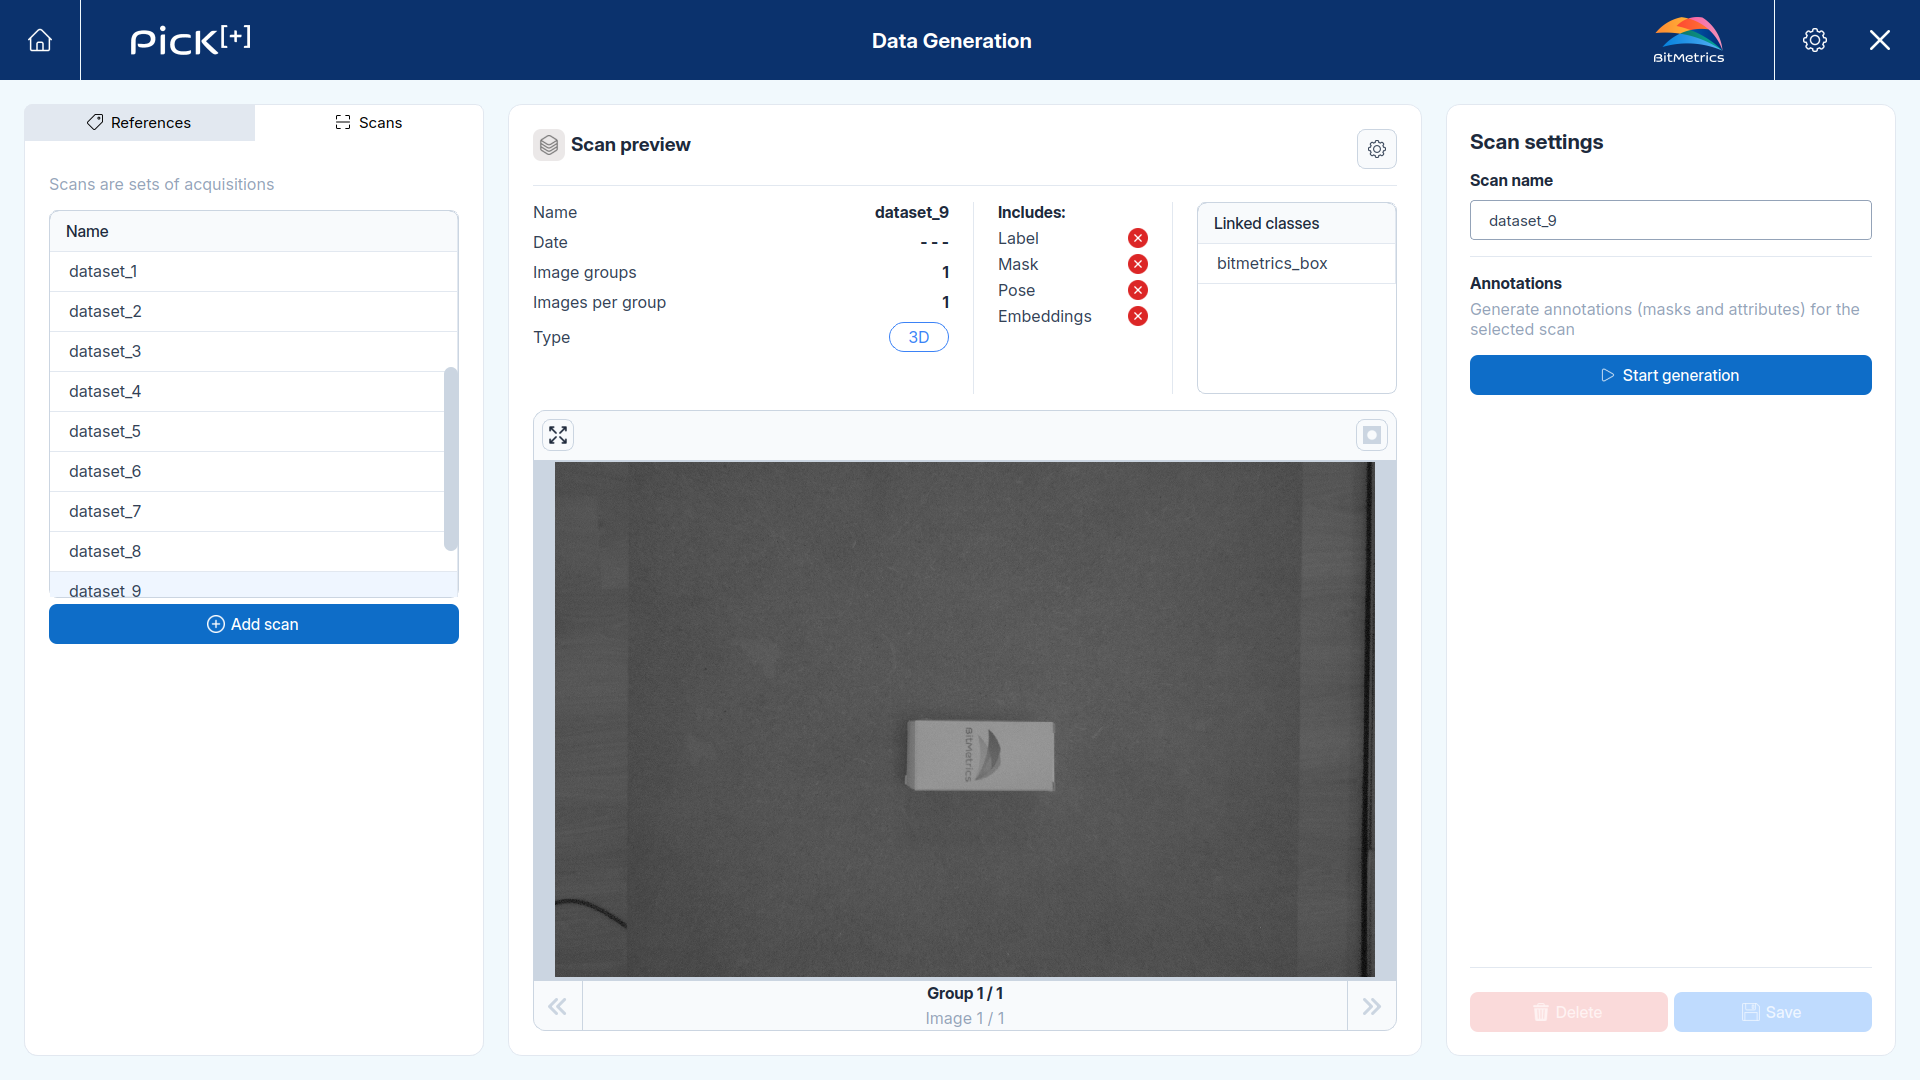
A raw scan is composed of images and point clouds, annotations turn it into data the AI models can use. The Includes list shows which annotations have been generated for this scan: Label, Mask, Pose and Embeddings, each marked with a green check once generated.
| Annotation | Description |
|---|---|
| Mask | Instance segmentation mask that isolates the scanned object from the background. Needed for most workflows. |
| Embeddings | Feature embeddings for the scanned object, used in advanced identification scenarios such as Similarity-Based Picking. |
To generate them, click the button at the top of the preview to open the scan's settings. And click Start generation to automatically generate the mask and embeddings annotations for this scan.
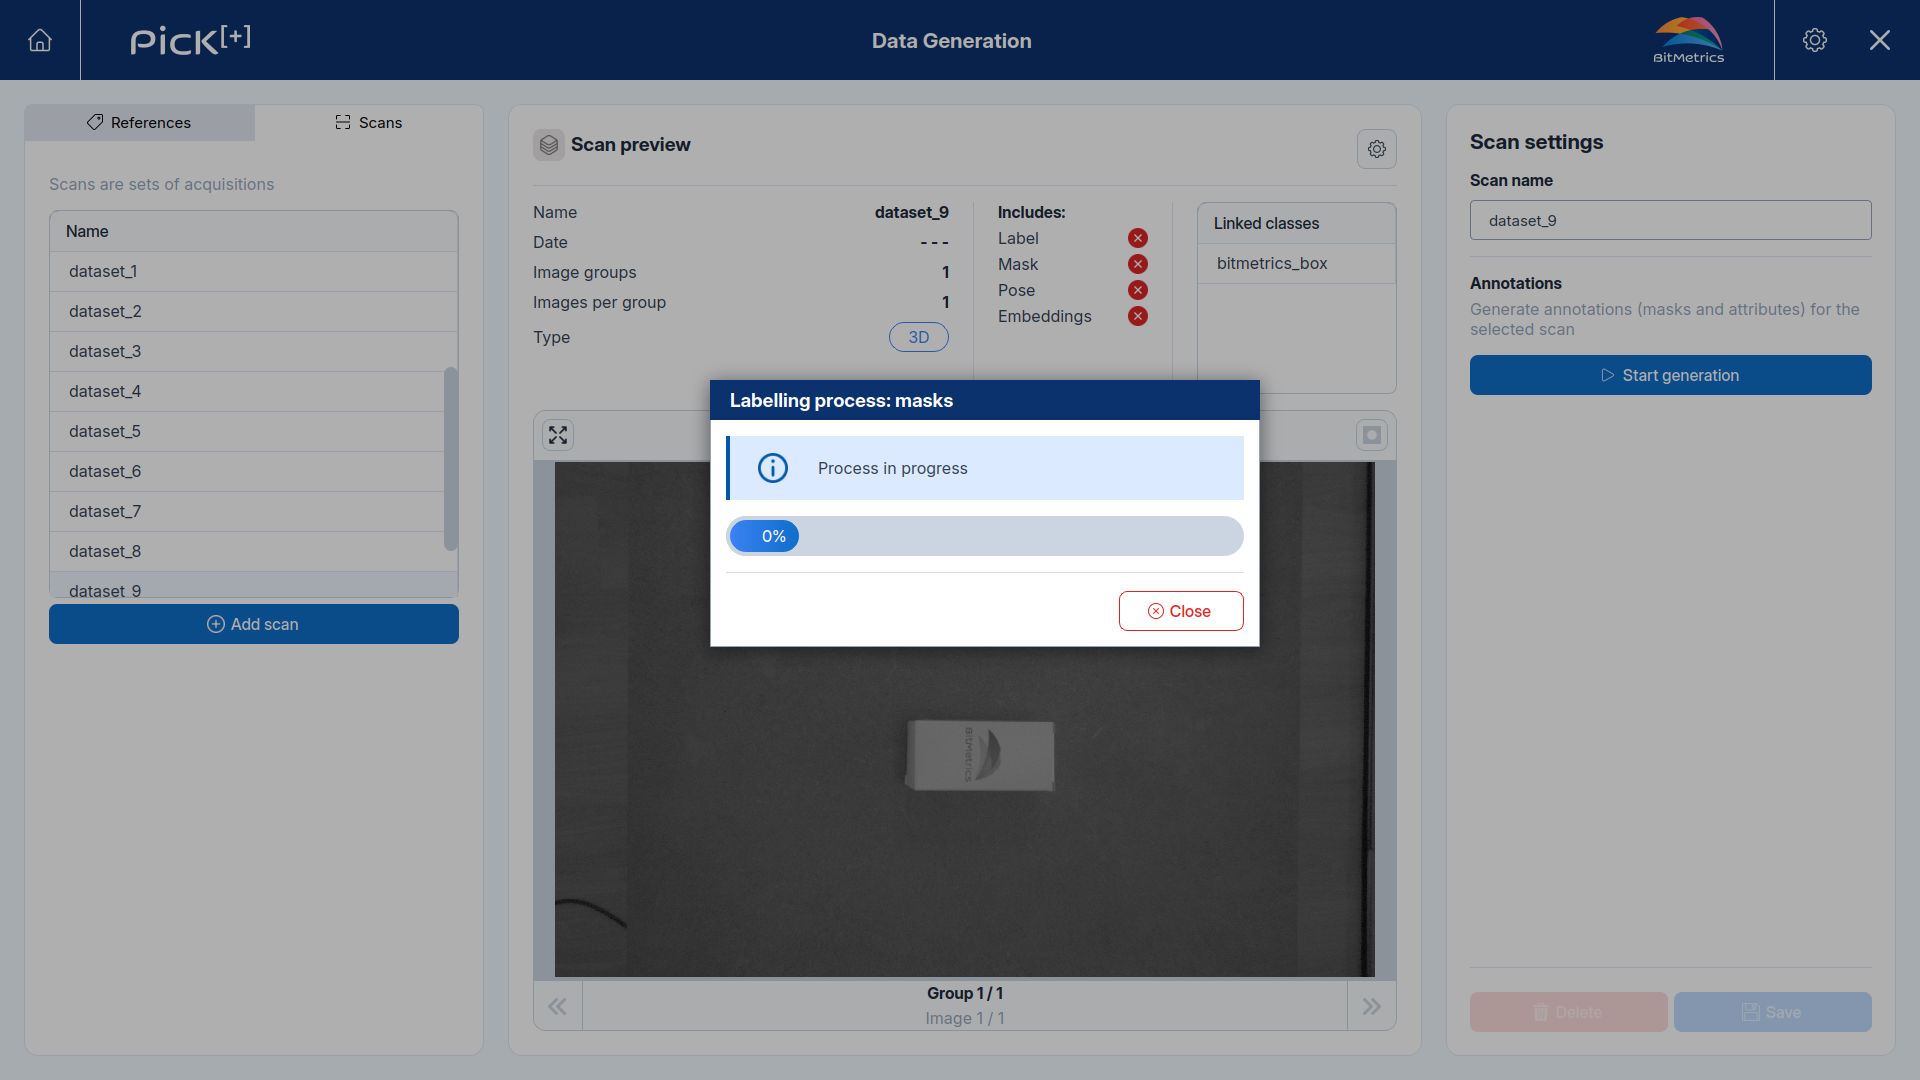
Once generation finishes, the Includes list updates to show the new annotations.
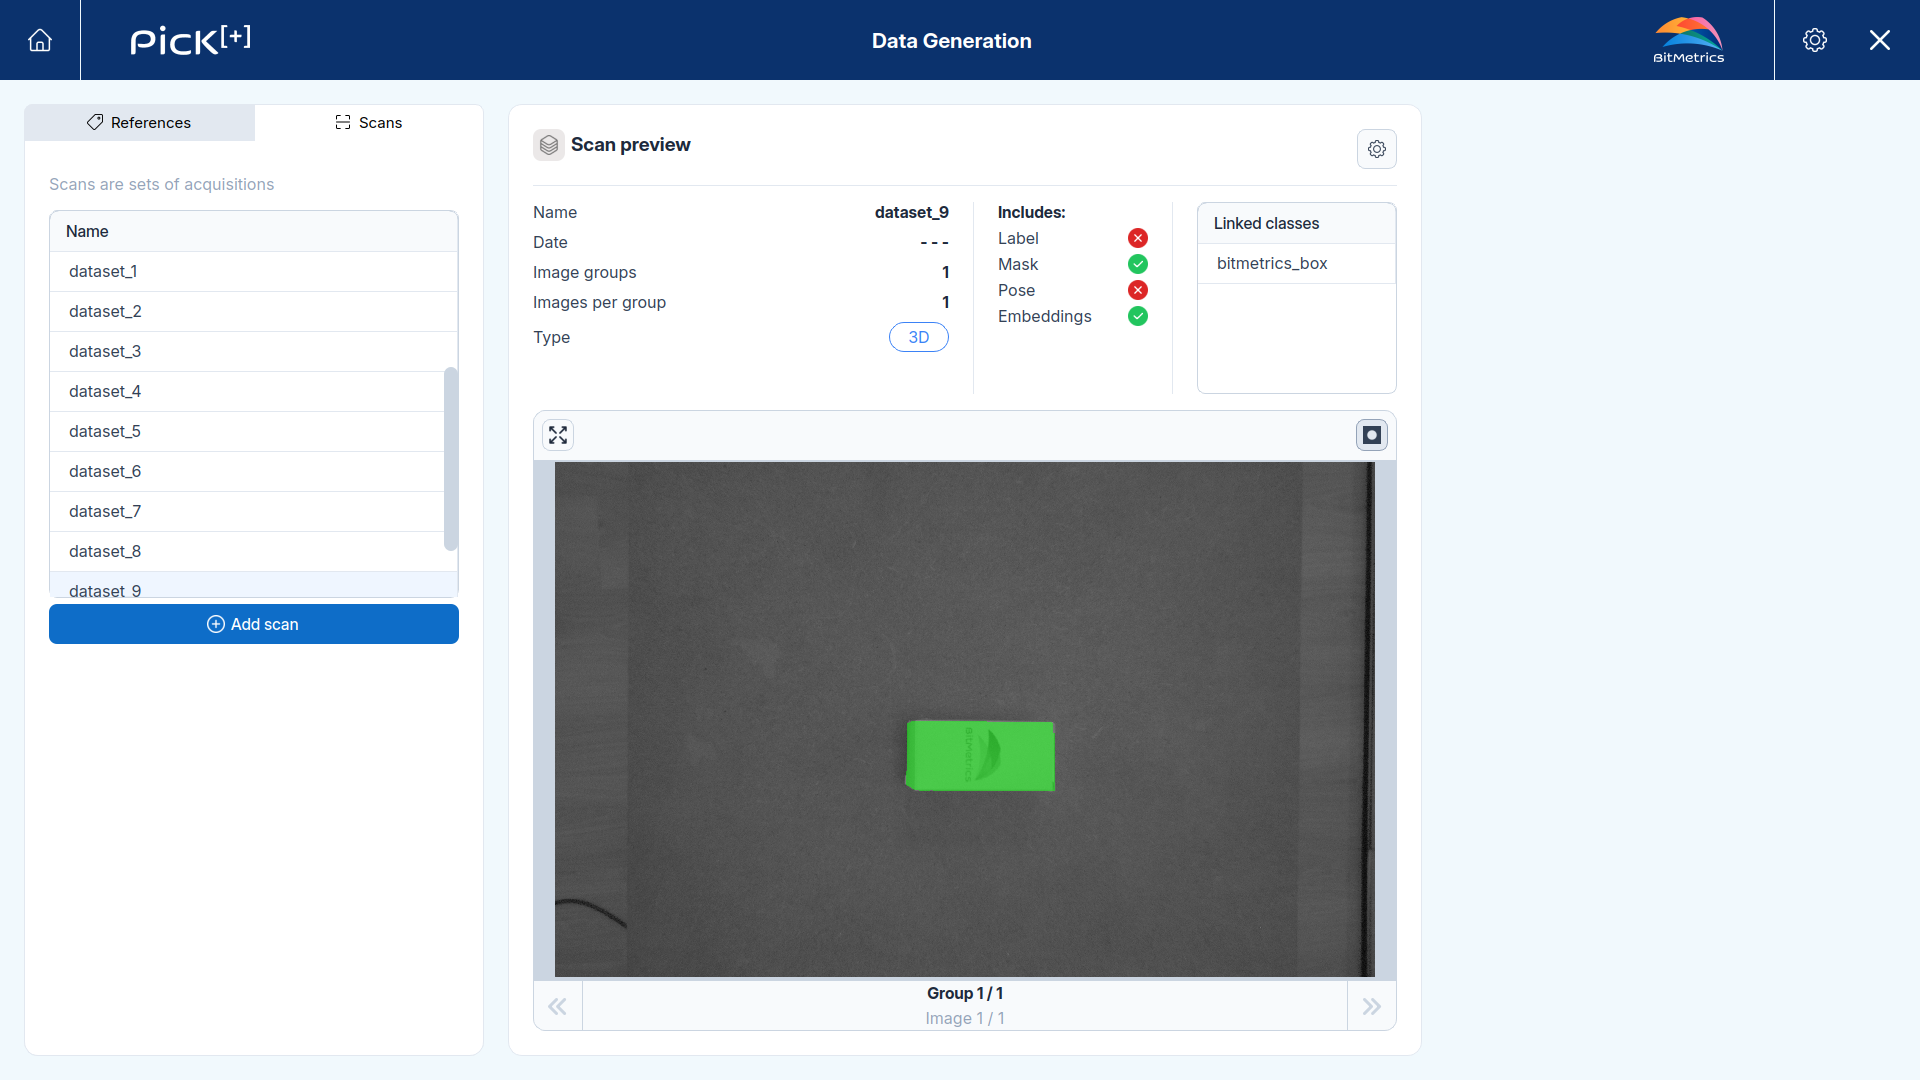
Always check the mask
Click the toggle button in the top-right corner of the image viewer to overlay the generated mask on the image. Always check it after generating annotations to confirm it correctly isolated the object.
Once mask and embeddings are generated, the scan is ready to activate its linked reference for Similarity-Based Picking, or to be used for 3D model generation.
Click Save to apply your changes, or Delete to permanently remove the scan (the button is disabled if that scan is linked to a reference).