Object is not segmented
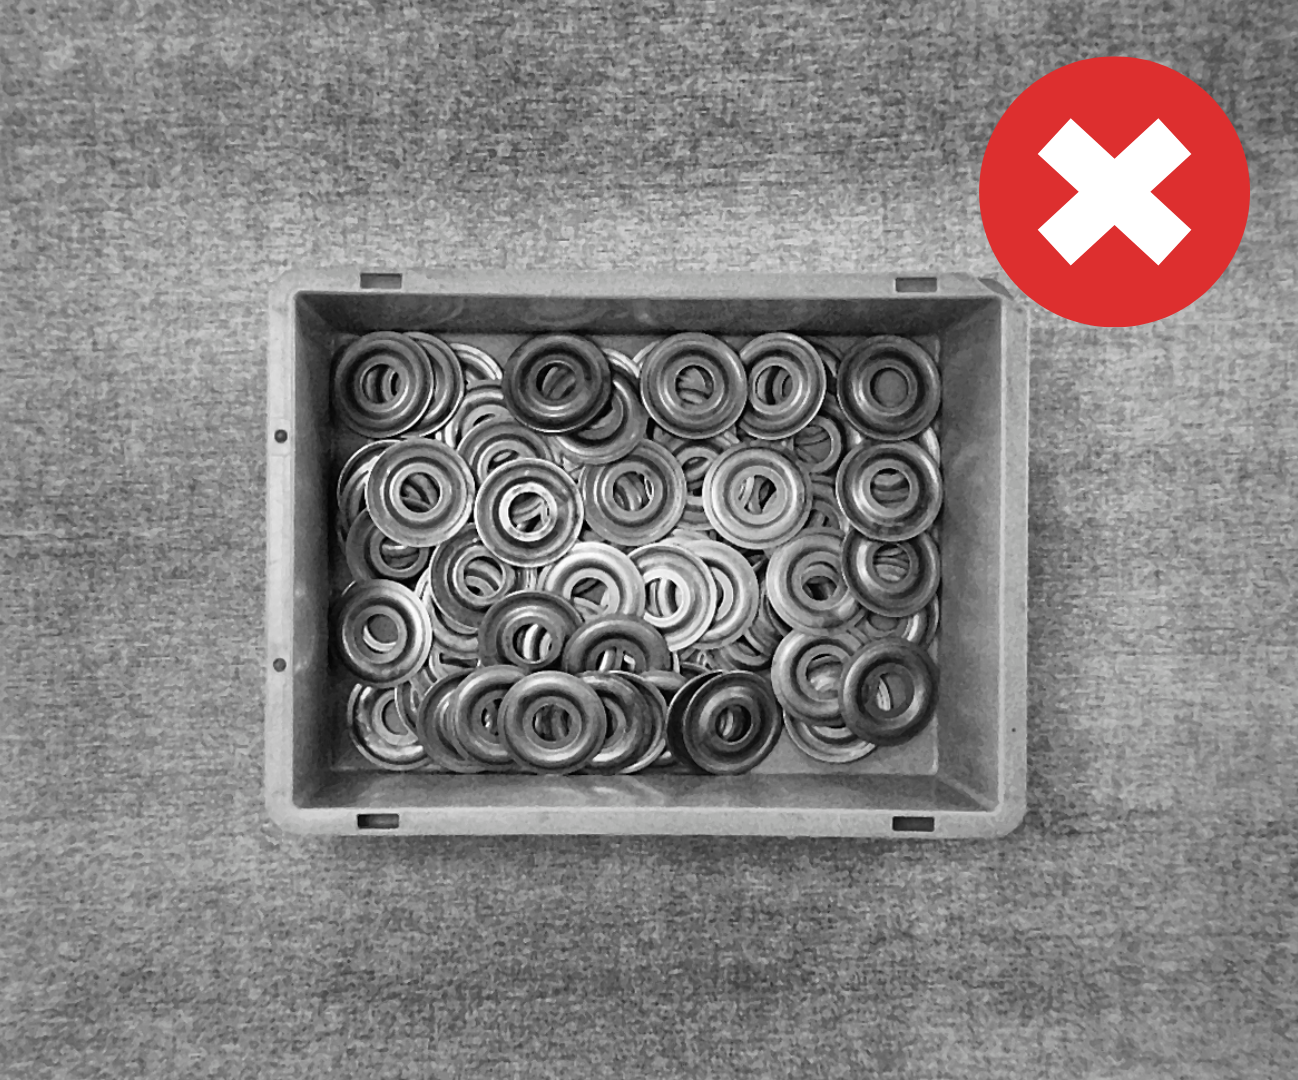
If the application is running but the object is not being detected or segmented at all, follow the steps below depending on the application type you are using.
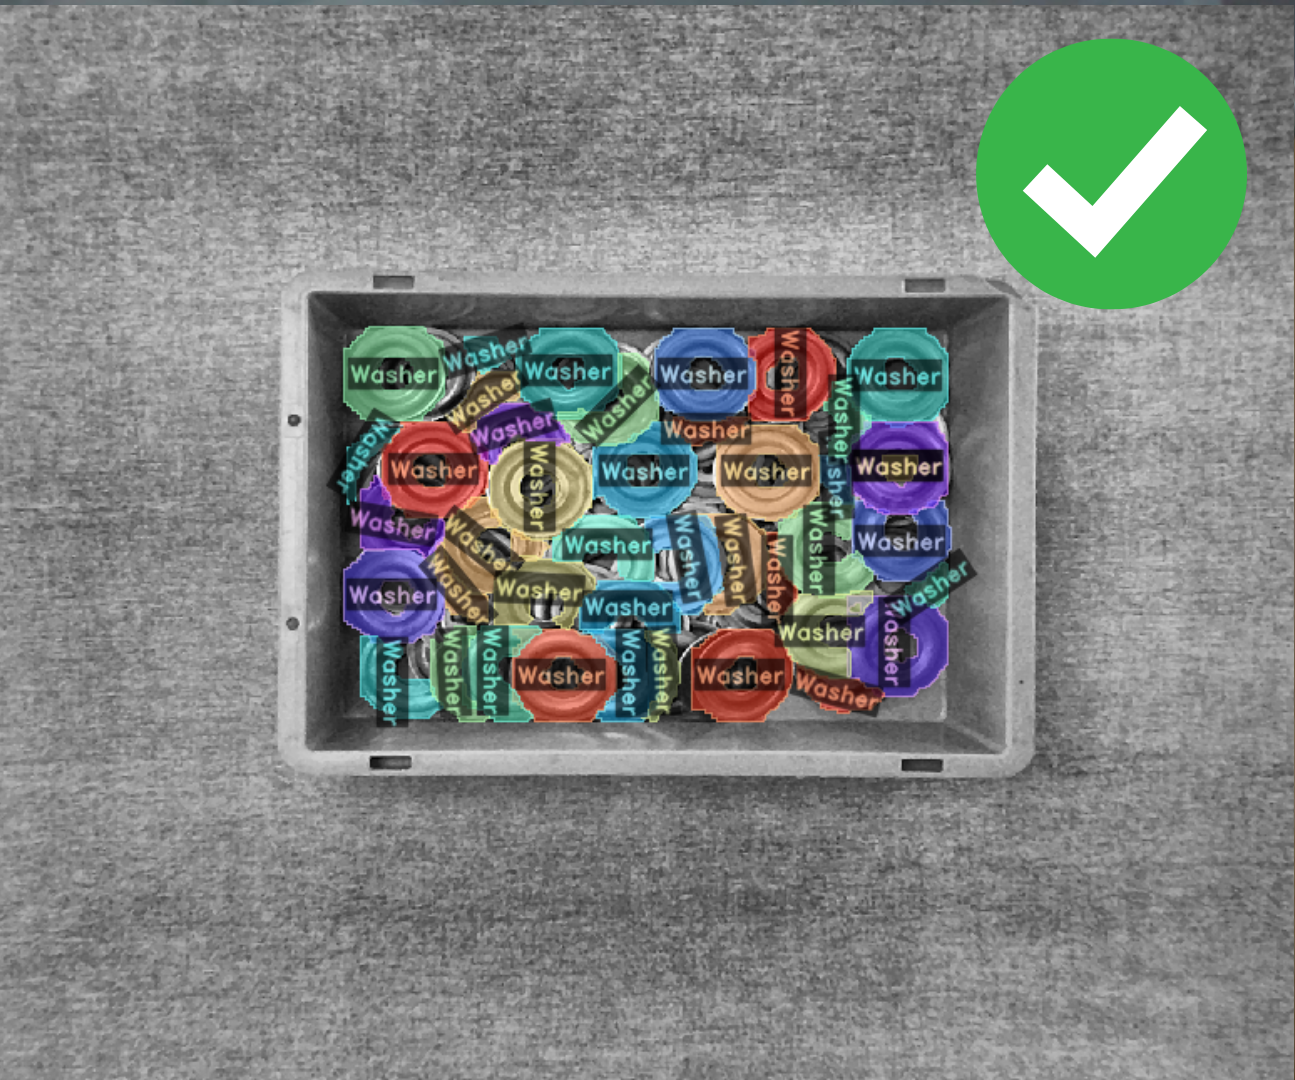
Segmentation works, but no pick point is generated
If the objects are segmented (you can see the masks in the image) but the picking points for the robot do not appear, please check this page: No pick point generated
Camera & scene checks
Before investigating AI model issues, ensure the camera is capturing the scene correctly. These checks apply to both U-Pick and K-Pick applications.
1. Working distance
The Intel RealSense camera requires a minimum working distance of approximately 30–40 cm between the camera lens and the object. If the camera is too close, the depth sensor cannot generate a valid point cloud.
Quick check
Measure the distance from the camera to the top of the objects in the bin. If it's below 30 cm, raise the camera or lower the bin.
2. Exposure settings
Incorrect exposure is one of the most common reasons for segmentation failure. If the image is too dark or too bright, the system cannot distinguish the object from the background.
Symptoms of bad exposure:
- Image appears very dark (under-exposed). Common with dark backgrounds and auto exposure enabled.
- Image appears washed out or white (over-exposed). Common with very bright backgrounds or direct light.
Recommended steps:
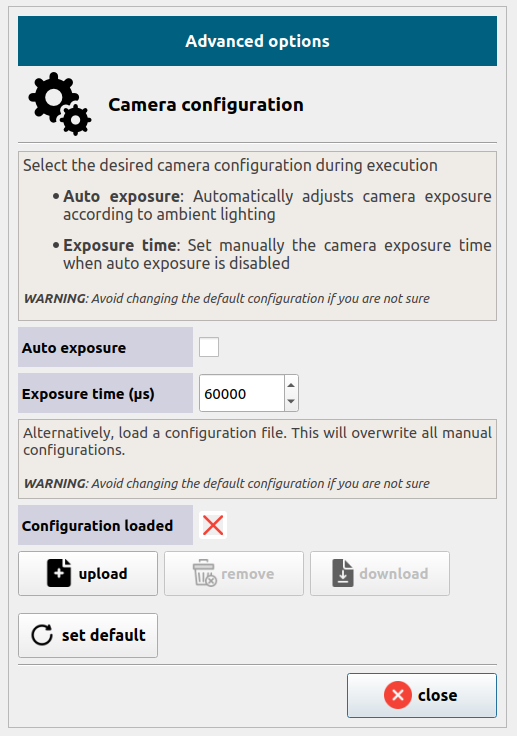
- Open Settings Manager and go to the camera advanced options.
- Disable auto exposure: Auto exposure can be unreliable when the background is very dark (it reduces exposure too much) or very bright.
- Set the exposure manually starting at 60000 µs and adjust in steps of 10000 µs up or down.
- Execute the application and observe the image in the execution viewer:
- If the image is too dark → increase the exposure value.
- If the image is too bright → decrease the exposure value.
- Repeat until objects are clearly visible without being washed out.
Avoid direct sunlight
Direct sunlight or strong light sources shining onto the objects severely degrade the point cloud quality. Relocate the setup away from windows or use diffused artificial lighting.
3. Object material limitations
The Intel RealSense depth camera has known limitations with certain materials:
| Material | Issue |
|---|---|
| Highly reflective metals (polished steel, chrome) | Infrared light reflects specularly, causing holes in the point cloud |
| Transparent objects (glass, clear plastic) | Infrared light passes through the object, making it invisible to depth |
4. Background contrast
If you are using auto exposure (or even manual exposure), the background color can affect detection quality:
- Very dark backgrounds cause the camera to under-expose the scene.
- Very light backgrounds can cause over-exposure or reduce contrast with the object.
Recommendation
Use a neutral, medium-toned background (e.g., light grey) that provides good contrast with the object. Avoid pure black or pure white surfaces.
K-Pick: AI model detection issues
If the object segments correctly in U-Pick but fails in K-Pick, the problem lies in the AI detection model or its configuration. Follow these steps in order:
1. Check Pick[+] Trigger node filters
The Pick[+] Trigger node in the robot program may be filtering out detections.
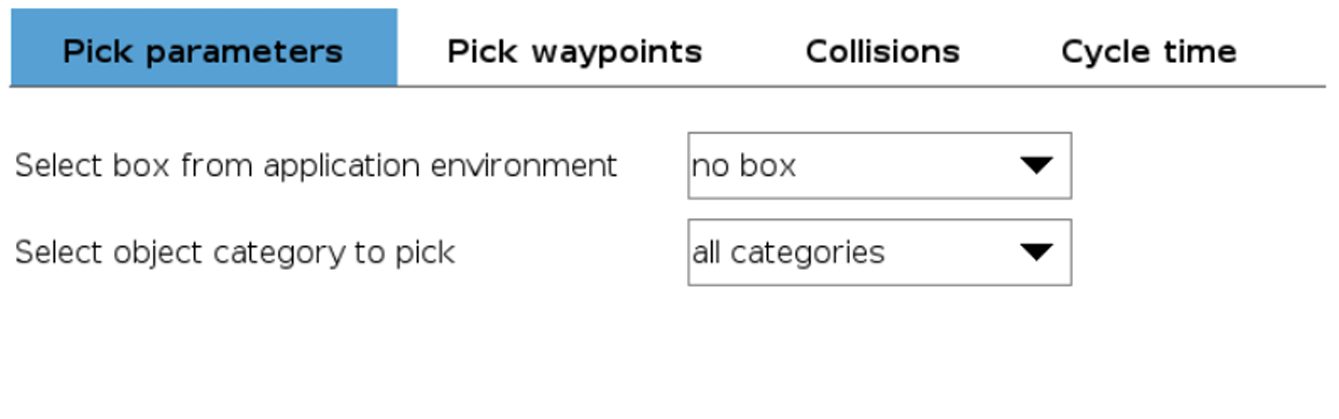
Verify the following settings:
- Environment Box → Set to
no box(to disable spatial filtering temporarily). - Pick Category → Set to
all categories(to disable category filtering temporarily).
If the object is now detected, the issue was in the filter configuration. Adjust the box or category as needed for your application.
2. Lower the Confidence Threshold
The AI model may be detecting the object but with a confidence score below the configured threshold.
- Open the Execution Manager for your K-Pick application.
- Go to Advanced options.
- Reduce the Confidence Threshold to a low value (e.g., 60%).
- Execute the application again.
If the object is now detected (with low confidence), the model recognizes the object but is not confident enough. This usually means:
- The scanning conditions were different from the execution conditions (lighting, orientation, background).
- The scan quality needs improvement (see steps below).
Important
A very low confidence threshold is only for diagnostic purposes. Once you identify the issue, retrain or rescan to improve confidence and restore a higher threshold.
3. Verify model training quality (Loss value)
Check the Loss value of your trained application:
- A Loss below 0.15 indicates the model learned to discriminate between objects well.
- A Loss above 0.15 suggests the model is struggling — possibly because objects are too similar to each other or scan quality is poor.
If the Loss is too high, consider rescanning with better conditions or reducing the number of similar-looking categories.
4. Review scan quality
Poor scanning leads to poor detection. Open the scan images and verify:
| Problem | Cause | Solution |
|---|---|---|
| Images appear burnt/white | Exposure too high during scan | Reduce exposure before rescanning |
| Images appear very dark | Exposure too low during scan | Increase exposure before rescanning |
| Object blends with background | Background color too similar to object | Use a background with more contrast (neutral grey works well) |
| Object only detected in some orientations | Missing views in the scan | Add views for all possible orientations |
5. Ensure complete 3D scanning
If the object can appear in multiple orientations during the application, the scan must cover all of them:
- Open Object Scanning in the Data Manager.
- Verify that the sample type is set to Complete (3D).
- Add views for each distinct orientation the object may present in the bin.
If you can see a face of the object during execution that was never scanned, the model will struggle to recognize it. Scan all faces that may be visible.