Connection Setup
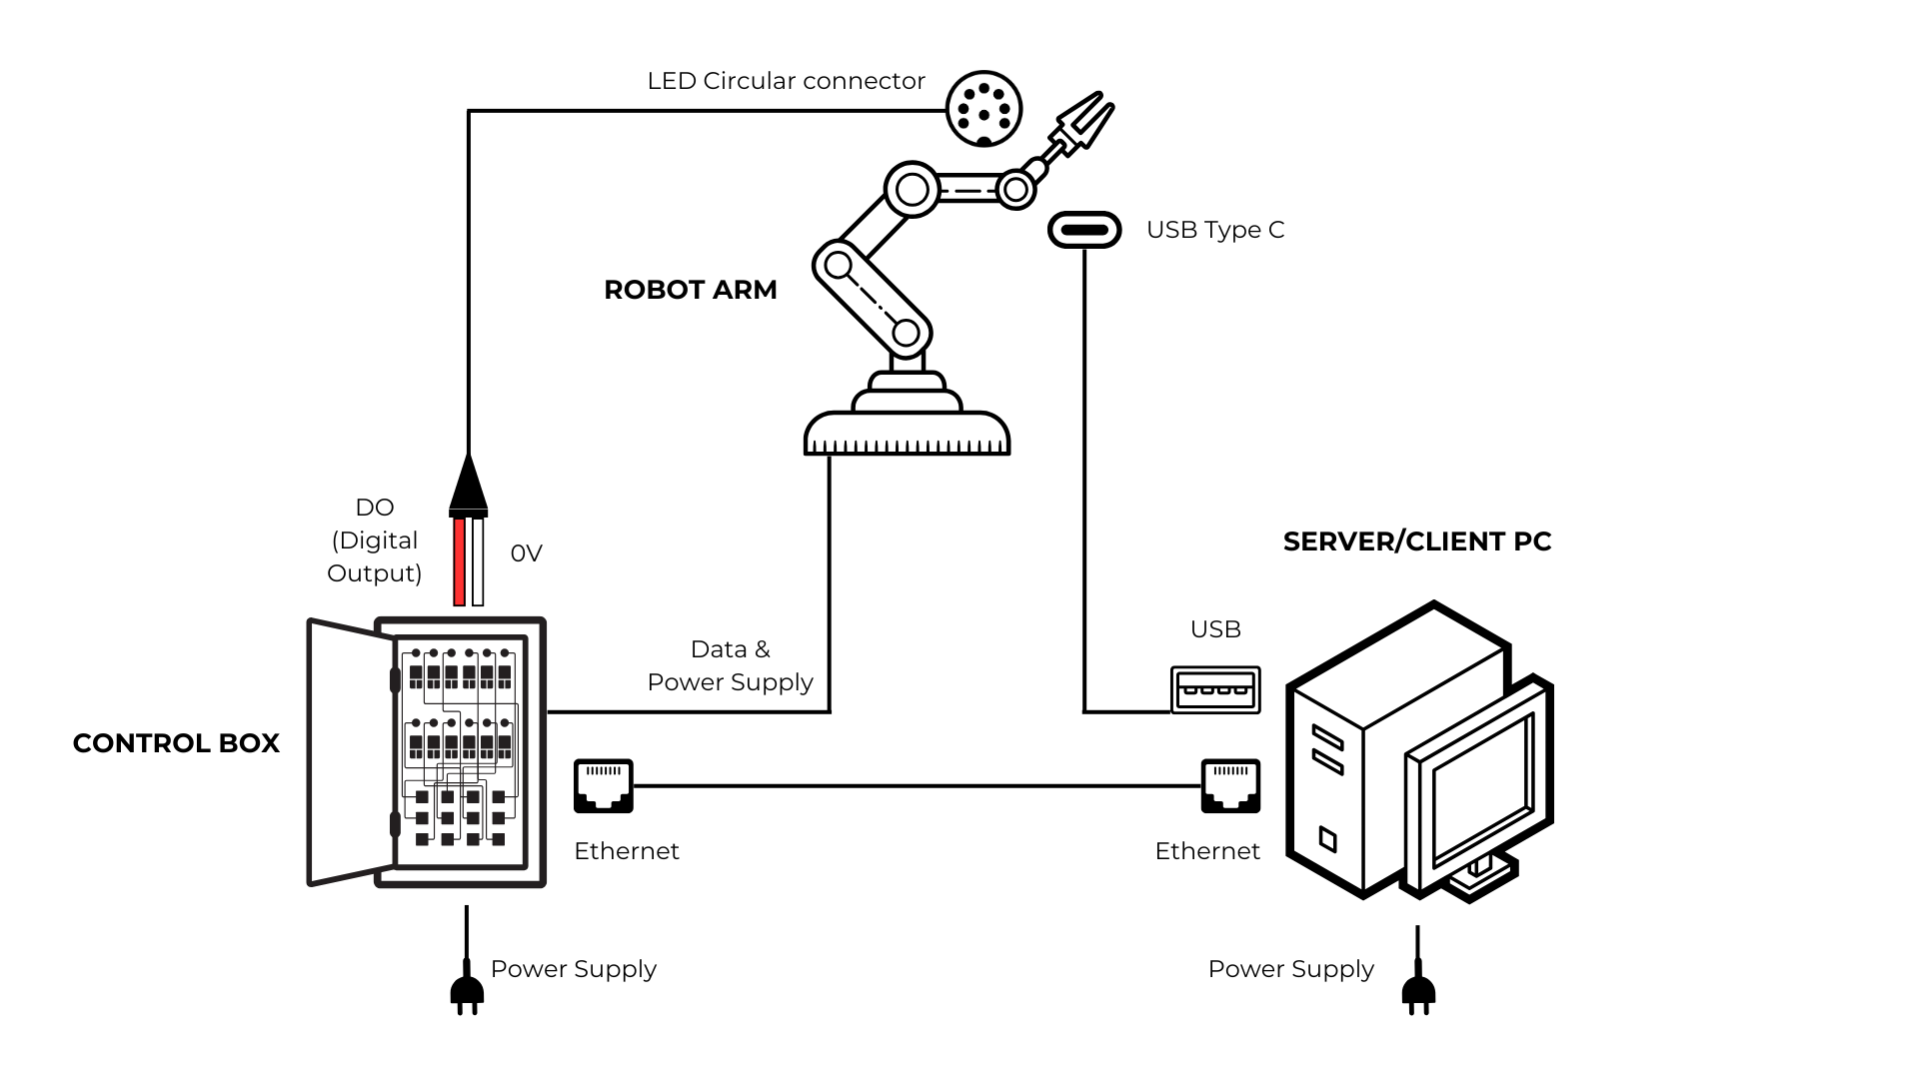
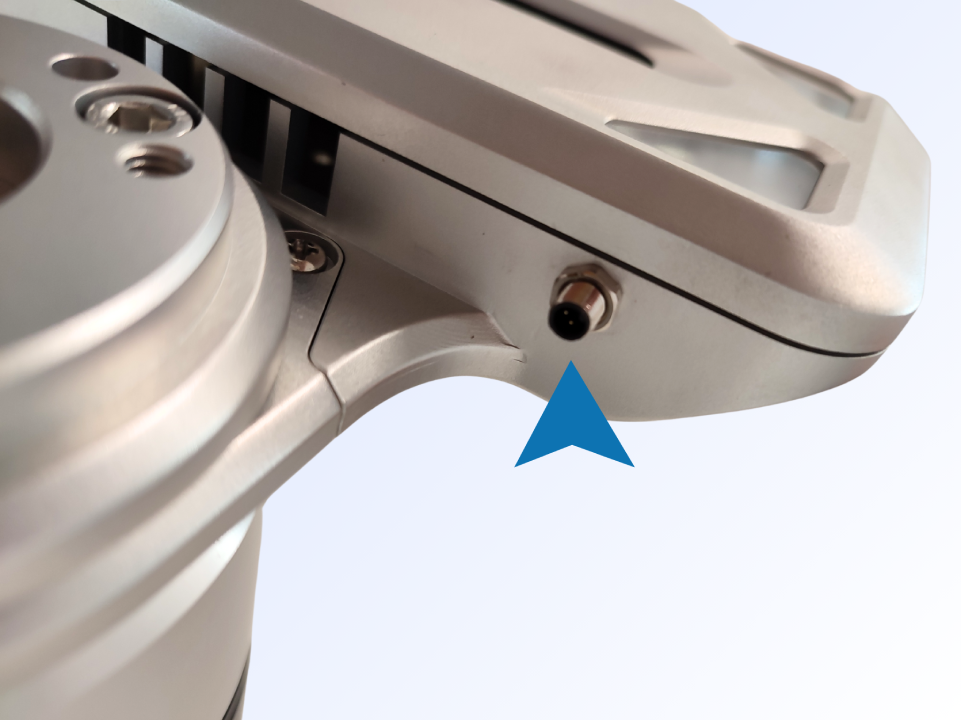
LED Lights Connection
-
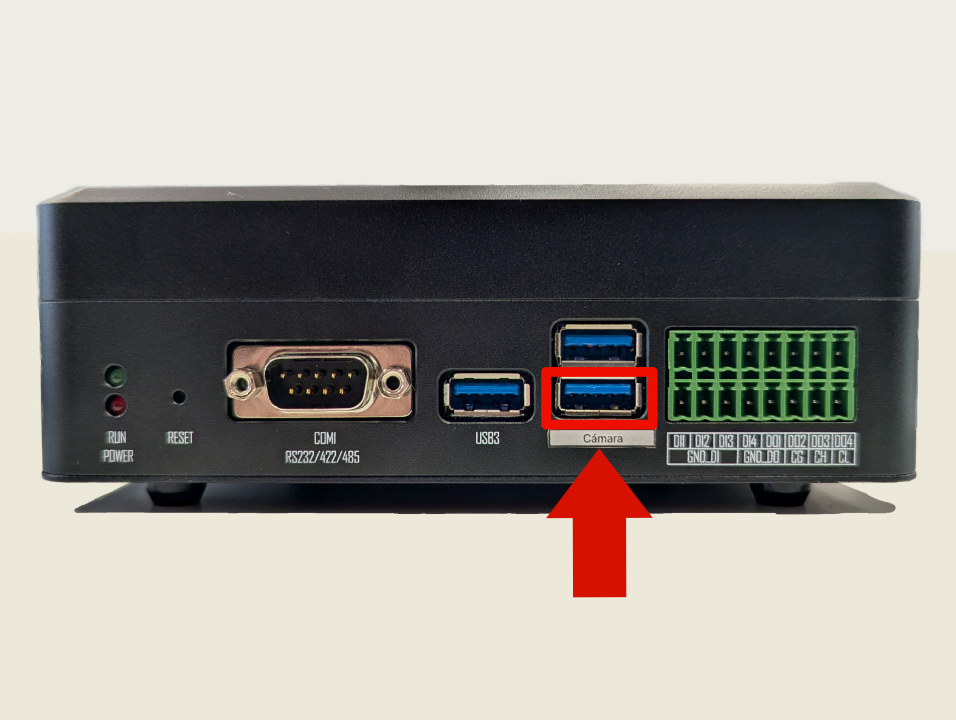
Connect the pinned end of the cable into the connection slot in the camera case (see left image).
-
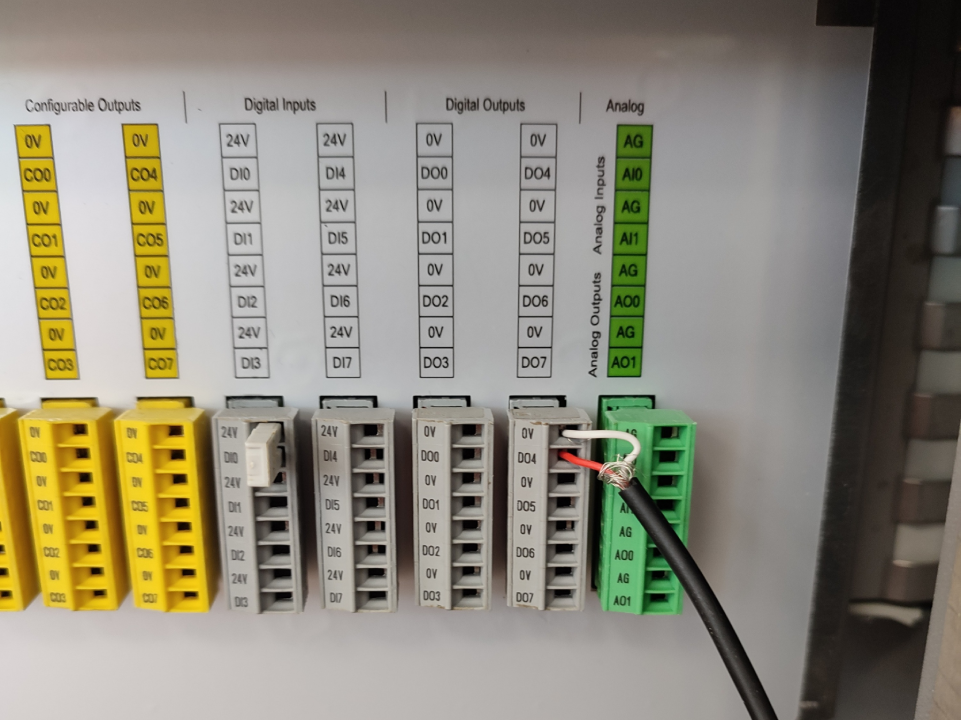
Connect the non-pinned end of the cable to the desired Digital Output connections rack:
- Connect the Red cable into the DO slot (see left image).
- Connect the White cable into the corresponding 0V slot (see right image).
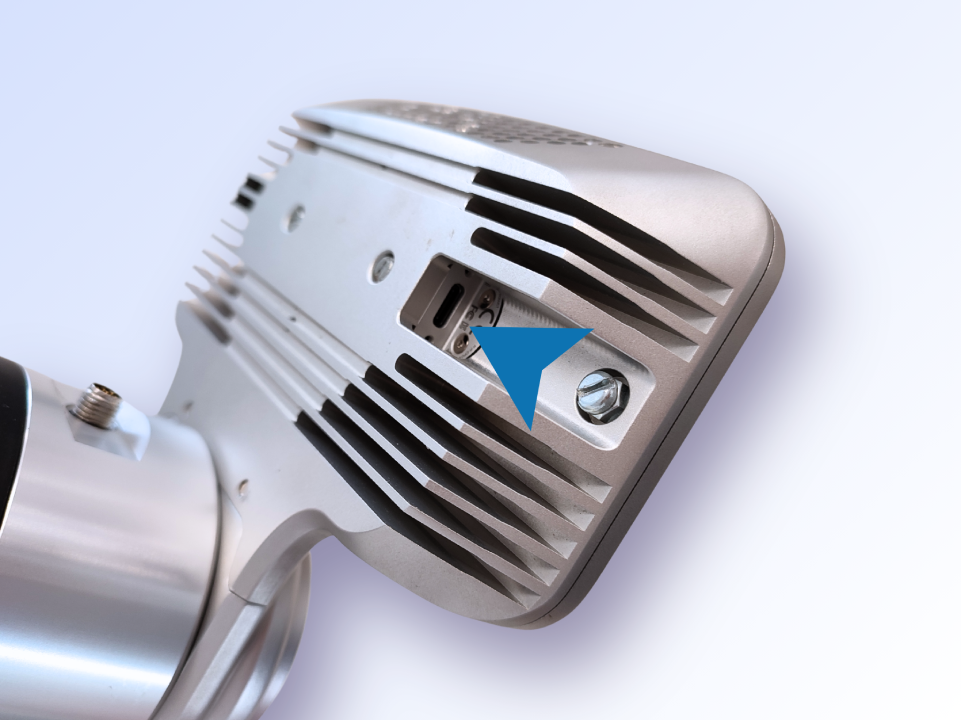
Camera Connection
-
Connect USB C end of cable to the camera.
-
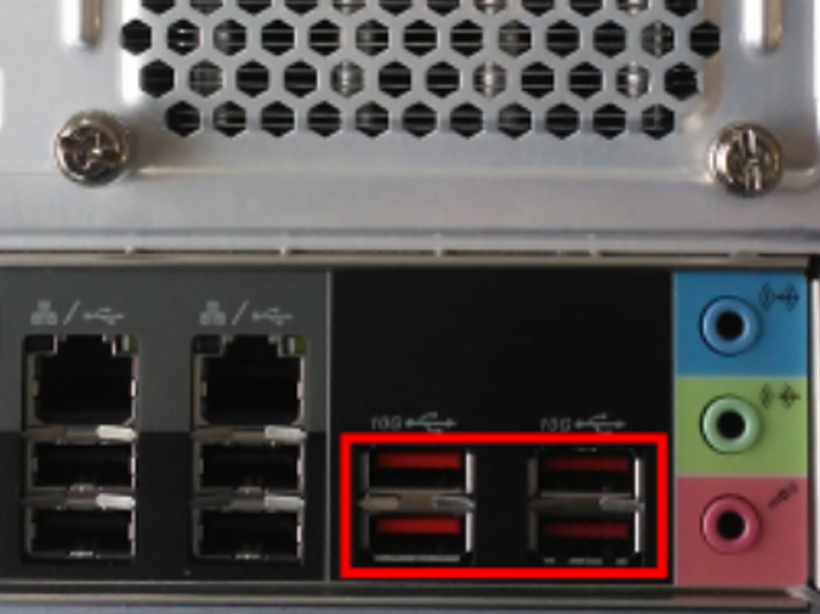
Connect the USB A end of the cable into a USB 3.1 Gen 2 or USB 3.2 port on the Server PC. These compatible ports are the red ones located on the back of the PC.
WARNING
- USB 2.0 is not supported-the camera will not connect.
- USB 3.0 or USB 3.1 Gen 1 will only enable the RGB sensor, depth functionality will be unavailable.
- A USB 3.1 Gen 2 or higher port (minimum 10 Gbps) is required for both RGB and depth sensors to function properly.
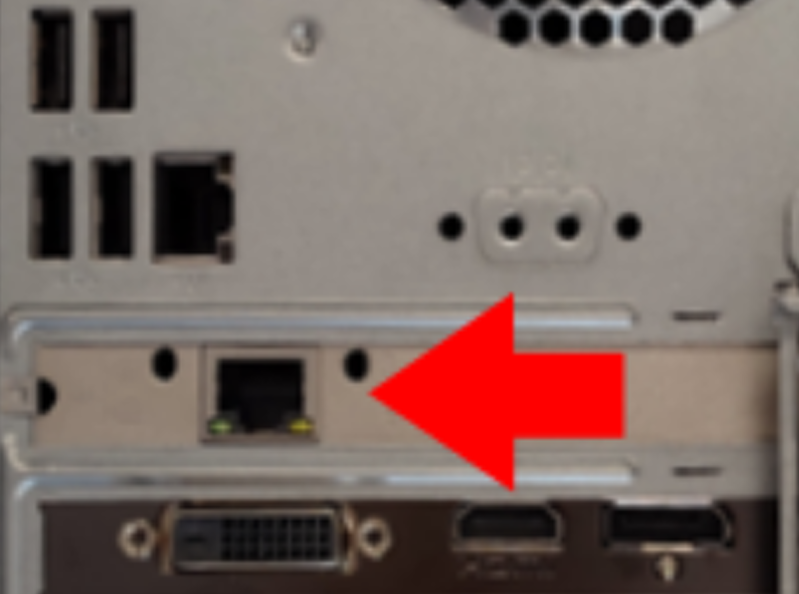
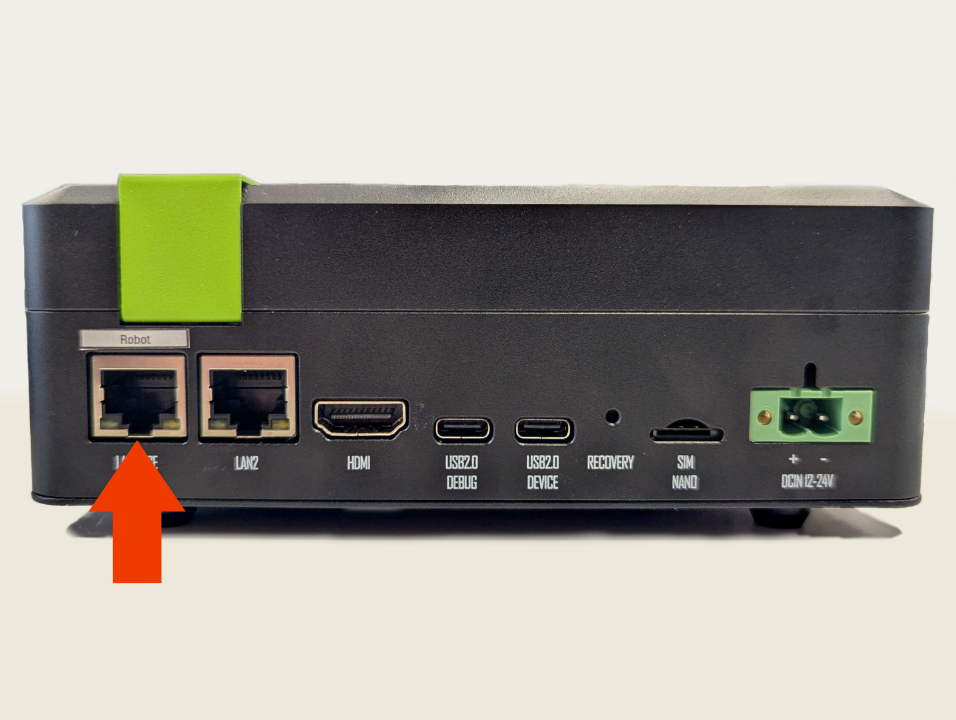
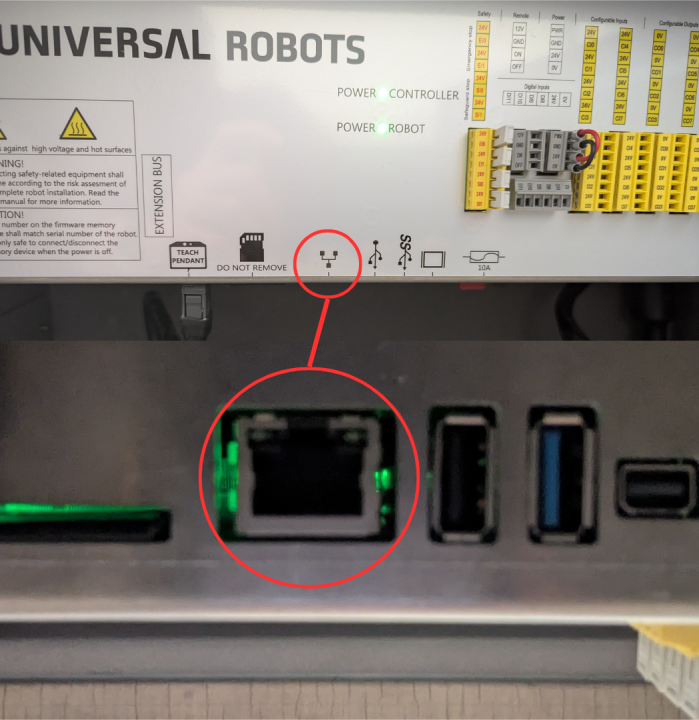
Robot Connection
-
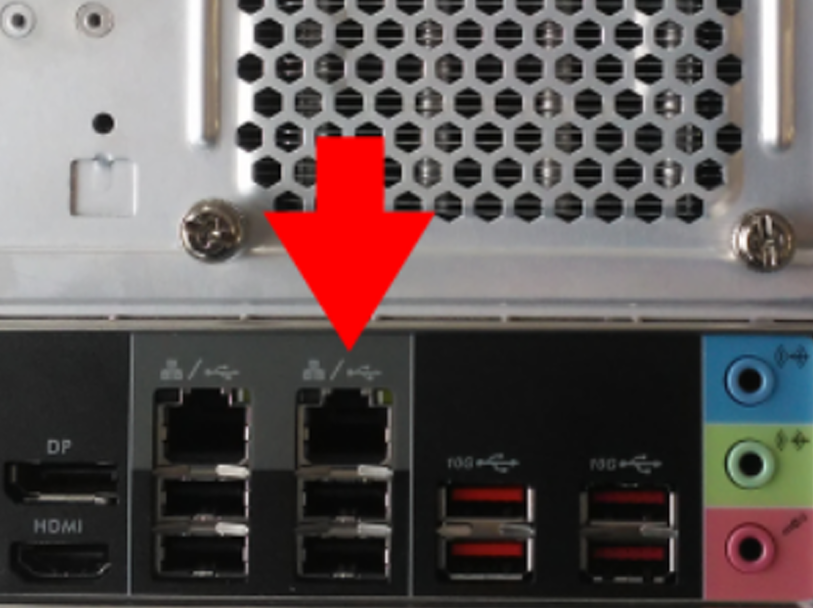
Connect the Ethernet cable to the corresponding port in Pick[+] Server PC.
-
Connect the Ethernet cable to the Robot Controller.
-
Configure the network settings on the robot and the Server PC. See the full IP Configuration guide for all required steps.