Application Editor
A K-Pick application defines a collection of known objects that the robot can detect and pick. Each application is trained with specific objects organized into categories, which determine how the robot interacts with them during execution.
-
What you'll learn
- How to think about categories
- Different ways to organize objects
- How to use categories in robot programs
- Step-by-step application creation
-
Before you start
Make sure you have:
- Objects scanned and saved in data repository
- Clear idea of robot actions needed
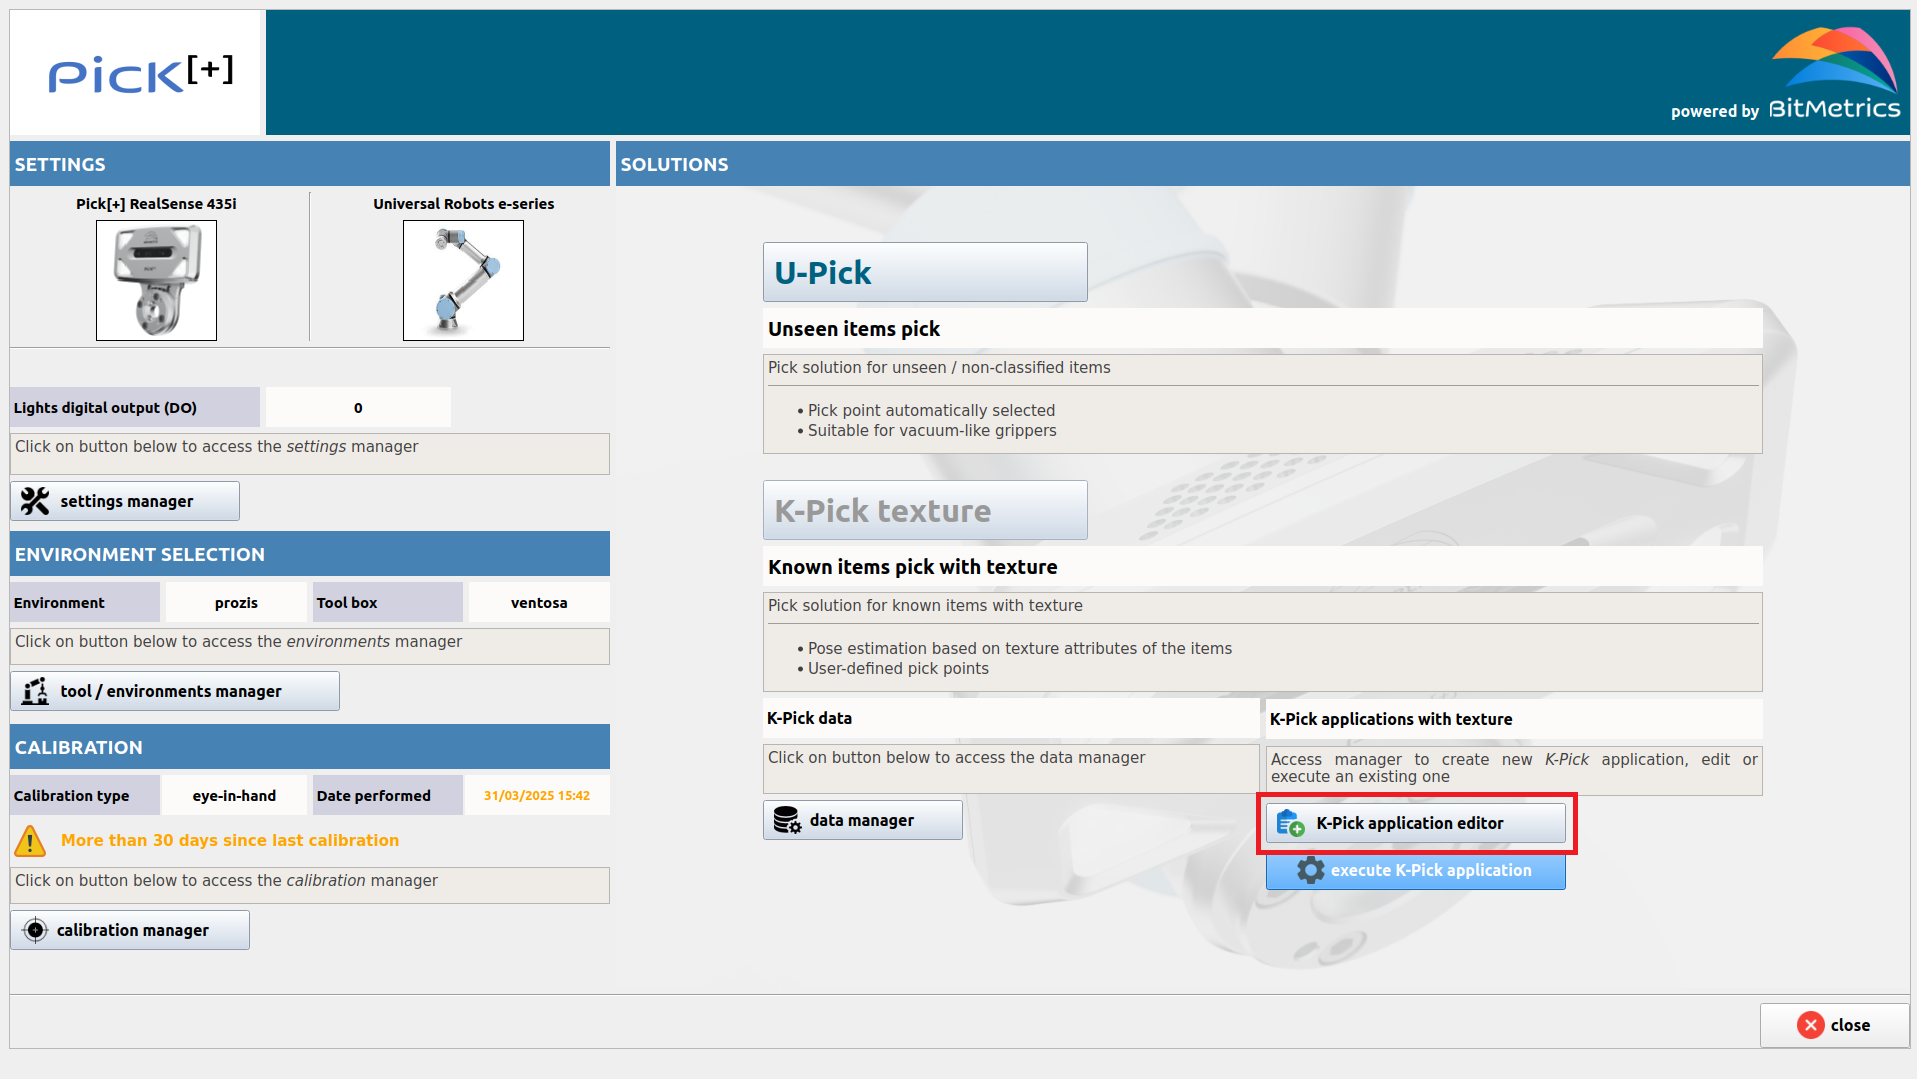
Accessing the application editor
To proceed with the creation or edition of a K-Pick application click K-Pick texture and then K-Pick application editor on the Homepage.
Understanding categories
Before creating an application, it's essential to understand the concept of categories and how they shape your picking strategy.
-
What are categories?
Categories are groups of objects.
Objects in the same category = Same robot action
Categories allow you to:
- Filter which objects to pick during execution
- Differentiate actions based on object type
- Organize your picking logic efficiently
-
How to think about categories
Key question when designing your application:
"What different actions will my robot perform?"
Each distinct action typically represents a different category.
Example: Multiple ways to organize the same objects
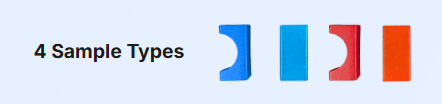
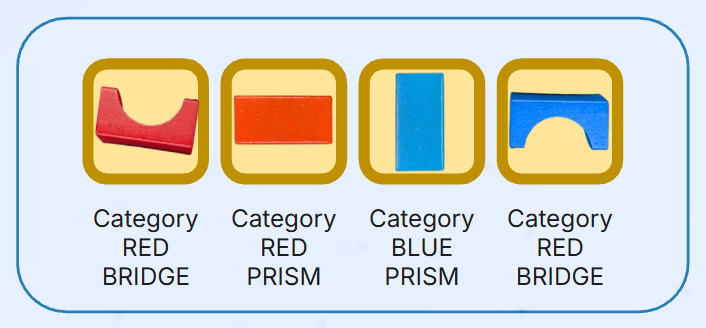
Imagine you have scanned these four samples: blue bridge, blue prism, red bridge and red prism
You could organize them in different ways depending on your application needs:
-
Option 1: Sort by COLOR
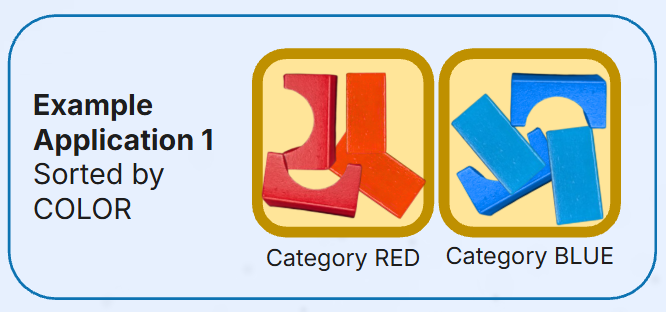
Categories:
REDandBLUEUse when: Robot places objects in different containers based on color
Example action:
If PP_CATEGORY == "RED" Place in Container A Else If PP_CATEGORY == "BLUE" Place in Container B -
Option 2: Sort by SHAPE
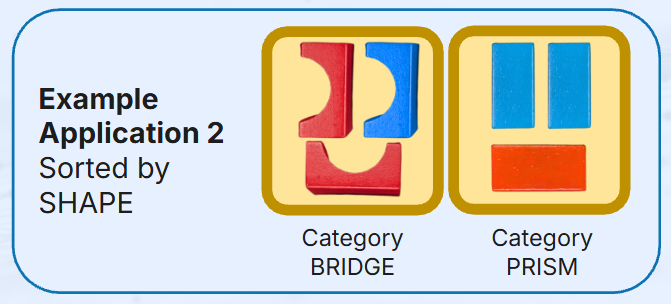
Categories:
BRIDGEandPRISMUse when: Shape determines the gripper strategy or placement
Example action:
If PP_CATEGORY == "SPHERE" Use soft gripper / Place in round holder Else If PP_CATEGORY == "CUBE" Use parallel gripper / Stack in corner -
Option 3: INDIVIDUAL categories
Categories:
RED_BALL,BLUE_BALL,RED_CUBE,BLUE_CUBEUse when: Each object requires unique handling
Example action:
If PP_CATEGORY == "RED_BALL"
    Place at Position 1
Else If PP_CATEGORY == "BLUE_BALL"
    Place at Position 2
Else If PP_CATEGORY == "RED_CUBE"
    Place at Position 3
Else If PP_CATEGORY == "BLUE_CUBE"
    Place at Position 4
Using categories in robot programs
The category names you define are used in your robot program in two key ways:
-
1. Filter objects to pick
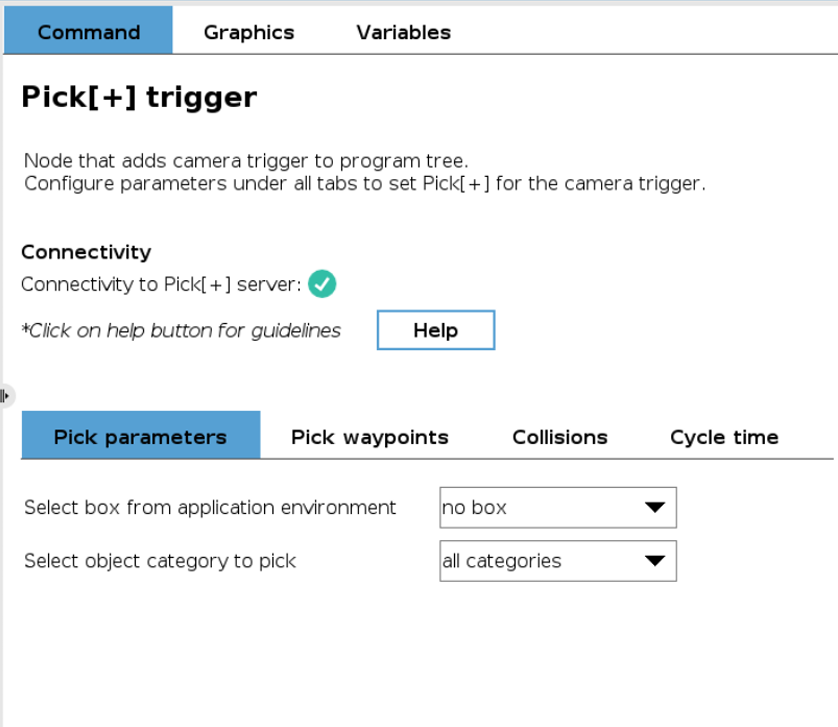
In the Pick[+] Trigger node, select a specific category to detect only those objects.
- Select "RED" → Only red objects detected
- Select "all categories" → All objects detected
-
2. Conditional actions per category

After picking, use the global variable
PP_CATEGORYto execute different actions:If PP_CATEGORY == "RED" # Move to red container MoveJ(red_place_pose) Else If PP_CATEGORY == "BLUE" # Move to blue container MoveJ(blue_place_pose)
Category name syntax
When using PP_CATEGORY in conditionals, always use the category name (e.g., "RED") enclosed in quotes, not individual sample names.
✅ Correct: PP_CATEGORY == "RED"
❌ Wrong: PP_CATEGORY == RED_BALL or PP_CATEGORY == "red ball"
Negatives category
The negatives category is a special default category for objects that should be ignored by the robot. Train the AI model to explicitly recognize and ignore unwanted objects, avoiding false positives.
Add objects that:
- Appear frequently in the scene
- Should never be picked
- Examples: fixtures, containers, background items, dividers
Create application
Now that you understand how to think about categories, follow these steps to create your application.
1. Select ID
Select and verify ID for the new application.

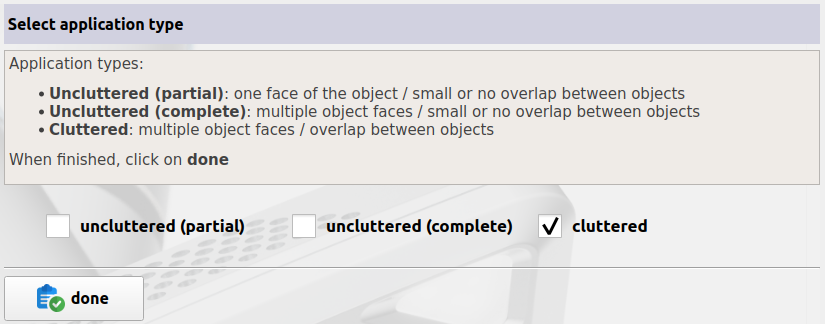
2. Select application type
There are three types of applications:
-
Uncluttered (partial): Applications where there is no overlap (or little overlap) between objects and only a view or face of the object is of relevance (i.e., the camera always observes the same face or view of the object).
-
Uncluttered (complete): Applications where there is no overlap (or little overlap) between objects but more than one view of the object is possible (i.e., the object can rotate and be seen by the camera with different orientations).
-
Cluttered: Applications where overlap between objects is indeed possible and all views of the object are possible (e.g., 3D random bin picking).
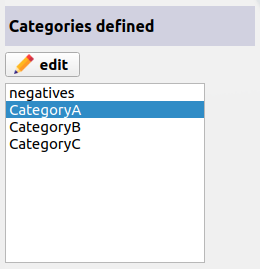
3. Select categories
Based on your application design (see Understanding categories above), define the categories you need for your picking strategy. Remember that each category represents a group of objects that will receive the same robot action.
The negatives category is already created by default. You can leave it empty or add objects that should be ignored during picking.
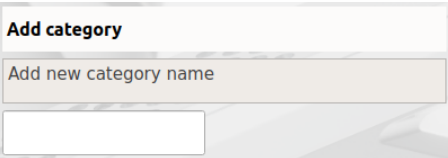
To add a new category:
- Enter the category name in the text field
- Click Add
To remove a previously added category, select it first and click Remove
Once all the categories are defined click Done
Naming categories
Choose clear, descriptive names for your categories (e.g., "RED", "BLUE", "LARGE", "SMALL"). These names will be used in your robot program to filter objects and execute conditional logic.
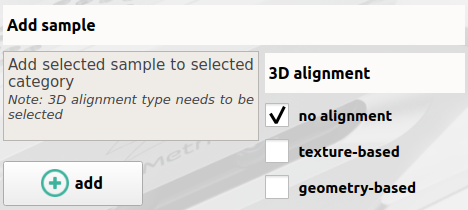
4. Add objects / samples to categories
Now assign your scanned objects (samples) to the categories you've defined. Remember that all objects within the same category will be treated identically by the robot.
Step 1: Select the category
Step 2: Choose the object sample

Step 3: Select alignment type
Choose how the robot will determine the object's pose in 3D space:
-
No alignment
Also called Auto-Pick, generates pick points automatically for the objects by finding flat surfaces where the surface contact tool fits.
If you define the diameter of the tool too big in Settings Manager, it will filter more pick points.
This option is NOT available for applications with a finger gripper.
Use for: Organic items, deformable objects, items without fixed geometry
-
Texture-based
Object pose determined by matching texture features of the scanned sample
Use for: Objects with rich, distinguishable textures and patterns and if you want to do an oriented place of the object.
-
Geometry-based
Object pose determined by matching the 3D model of the samples (either scanned objects or uploaded CAD).
This is the option to select if you've defined picking points in Points Manager.
Use for: Objects with distinct geometric shapes and features and precision picks.
Alignment availability
Some alignment options may not be available depending on the sample type. For example, samples with geometric variability (e.g., organic items) without a 3D model will only have the no-alignment option available.
Step 4: Add to category
Click Add to add the sample to the category
5. Save and train application
Click Save to store the application configuration in the data repository. Your categories and object assignments are now saved
Then click Train to start training the AI model, it will learn to identify, classify and locate objects in your pick scene.
Training process
The training consists of two stages:
-
Stage 1: Data Generation
Duration: 2-5 minutes
Synthetic training images are generated from your scanned objects
-
Stage 2: Learning
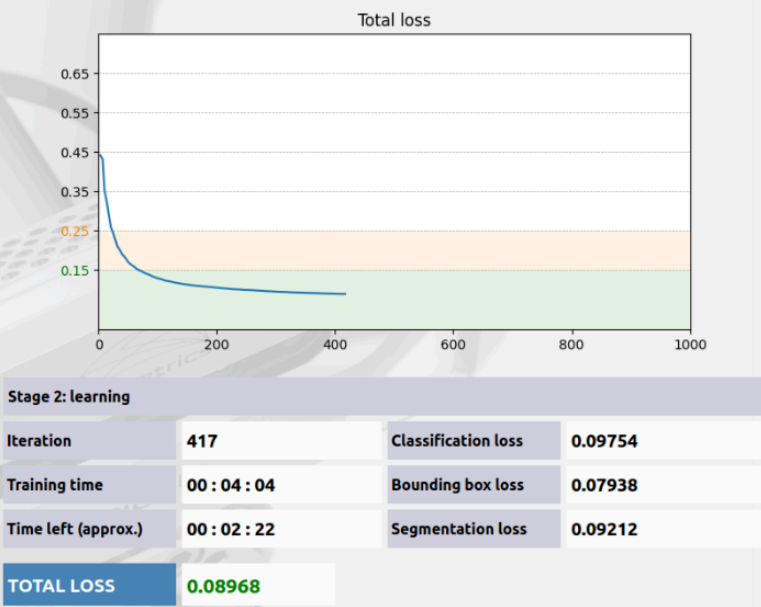
The AI model learns to recognize objects
Training metrics are monitored in real-time
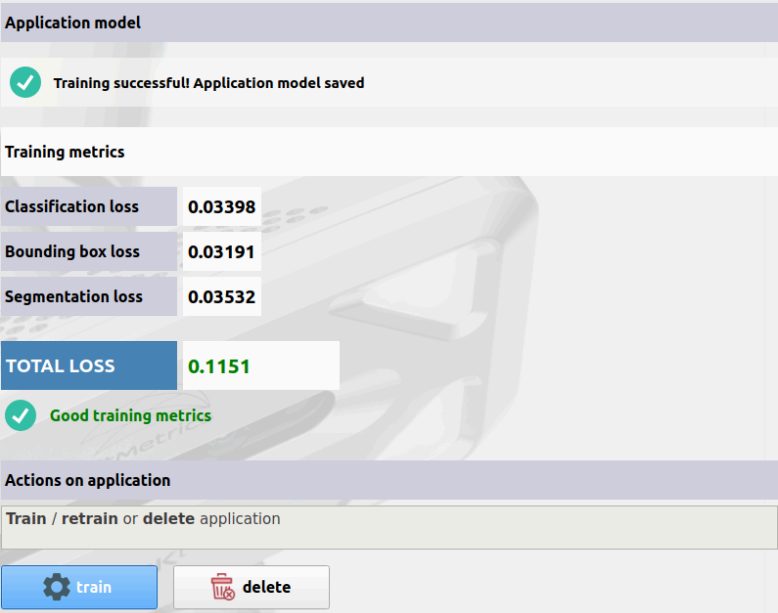
Understanding training results
After training completes, evaluate the Total Loss metric to assess model quality:
-
Total Loss < 0.15
Excellent model - Ready for production
The AI will reliably identify objects in your scene
-
Total Loss 0.15 - 0.25
Good model - Generally sufficient
Test in production environment and validate performance
-
Total Loss > 0.25
Poor model - May not work reliably
Review application design and identify issues
High loss troubleshooting
If your total loss is above 0.25, common causes include:
- Objects from different categories are too similar visually
- Insufficient contrast between object and background
- Poor quality scans or samples
- Conflicting category definitions
Consider reorganizing categories or rescanning objects with better lighting/positioning.