Object Scanning
The samples are the collection of images / data created during the scanning process that belong to a particular item or object. We can have different samples in our data repository that can later be used in the design of different applications.
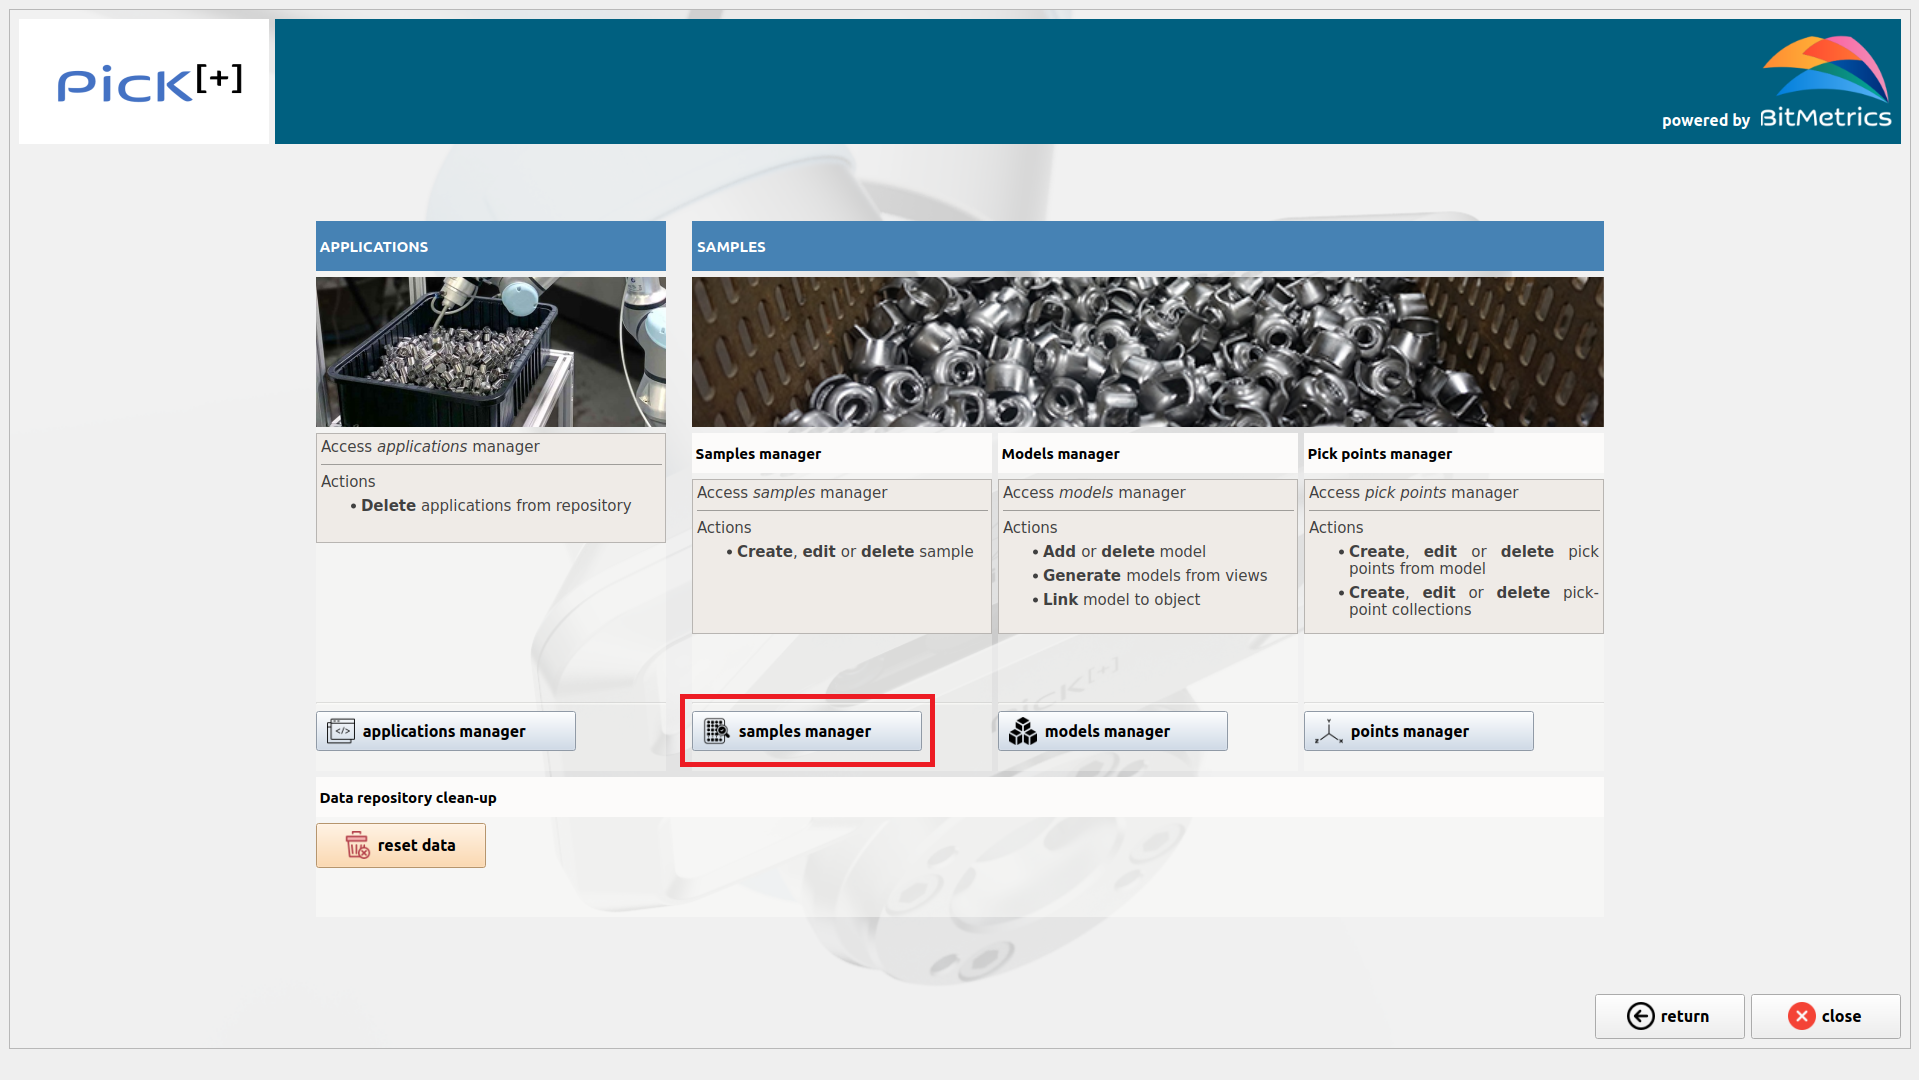
To proceed with the addition or edition of a sample we click Samples Manager inside the Data Manager
Views
To grasp geometry we capture what we call views. They consist of collections of RGB images and point clouds that refer to a surface section (i.e., a view from the camera) of the scanned object. Each view allows us to produce a 2.5D model of the object from the point clouds and robot poses. As such (2.5D), it does not capture the whole surface of the object. To do so we will need to add extra views. We will have as many 2.5D models of the objects as views we have.
Note
In order to work in a 3D environment (i.e., a 3D application), we need to make sure that the views generated will cover the whole surface of the object.
Textures
To grasp different textures of an object we capture what we call textures. Textures need to be representative of all the variability that will be found in the production environment (in the data augmentation phase during training of the instance segmentation model new cases will be produced by interpolation of the provided examples).
Note
Only textures not covered by views need to be added. Texture images produced during the scan of a view are also used.
If the object does not present variability in geometry we will require at least one view. If it presents variability in geometry we will require only textures (at least one texture).
Create new sample
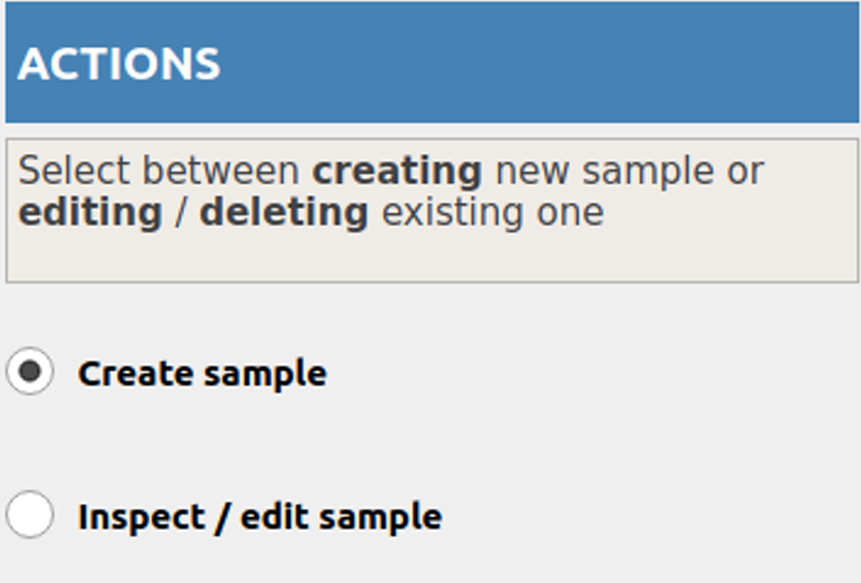
To create a new sample select the button Create sample under the heading Actions.
Enter and verify the new sample ID.
Next we need to indicate the type of sample / object we are dealing with. Samples can present variability in two ways:
- Variable geometry: the object does not have a 3D model. Different instances of the same object are not identical in shape (e.g., organic items).
- Variable texture: Different instances of the same object are not identical in terms of texture (e.g., Trident boxes of different flavors).
At this point we can edit the type of sample we are creating. Samples can be
- Partial (2D): samples correspond to one face (or a few faces) of the object. They do not cover the whole surface of the object. They can only be used for 2D applications, that's the case when the object during the application only appears in one orientation.
- Complete (3D): samples cover the whole surface of the object. They can be used both for 2D and 3D applications. In these cases, all the faces that can appear during application must be added as a view/texture.
Scan for views and textures
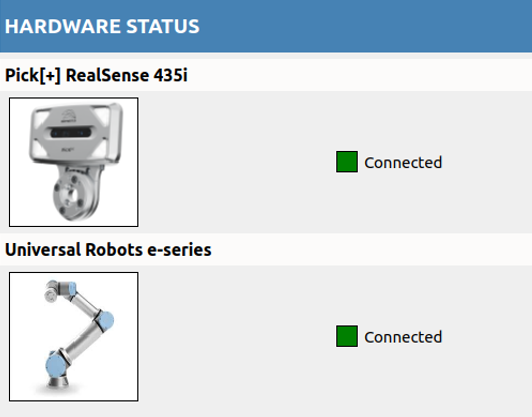
To scan first make sure that camera and robot are connected (and that robot is in remote mode).
To start scan process click Add View or Add Texture
Follow instructions on the robot console to place the camera-robot in the right way with respect to the scanning mat.
When done, click Start Scan and from then on follow instructions on the robot console.
When all desired textures and / or views have been produced click Save
To abandon scanning process any time click Quit without saving
Edit sample
To edit or inspect a sample select the button Edit / inspect sample under the heading Actions.

Select sample from the drop-down menu and proceed as with the creation of a new sample to edit sample features and to add / remove views and textures.
