IP Configuration
Pick[+] uses a dedicated Ethernet network to communicate between the Server PC, the robot, and optionally an external Client PC. By default, all components are preconfigured with the IP addresses listed below. Follow this guide if you need to verify the default setup or change the IPs to match your network.
Default IP Addresses
| Device | IP Address | Subnet Mask | Gateway |
|---|---|---|---|
| Pick[+] Server PC (Robot port) | 200.200.2.1 |
255.255.255.0 |
— |
| Robot Controller | 200.200.2.2 |
255.255.255.0 |
200.200.2.1 |
| External Client PC (optional) | 200.200.1.1 |
255.255.255.0 |
200.200.1.100 |
If you are using the default IP addresses and everything is working, no changes are needed.
Step 1. Server PC - Ethernet Adapter
Configure the Ethernet adapter on the Pick[+] Server PC that connects to the robot:
- Open Network & Internet Settings on the Server PC.
- Select the Ethernet adapter connected to the robot.
-
Set the following static IP configuration:
- IP Address:
200.200.2.1 - Subnet Mask:
255.255.255.0
- IP Address:
The Pick[+] Server PC is pre-configured with this IP address out of the box. Only change it if your network requires a different addressing scheme.
Step 2. Robot - Network Settings
Configure the robot controller so it can reach the Pick[+] Server:
- On the UR Teach Pendant, go to Settings → System → Network.
-
Set the network connection as follows:
- IP Address:
200.200.2.2 - Subnet Mask:
255.255.255.0 - Gateway:
200.200.2.1
- IP Address:
-
Click Apply to save the changes.
Warning
If the Ethernet connection is disabled, the robot will not receive commands from Pick[+] even if all IPs are correct.
Go to Settings → Security → Services and ensure all services are enabled.
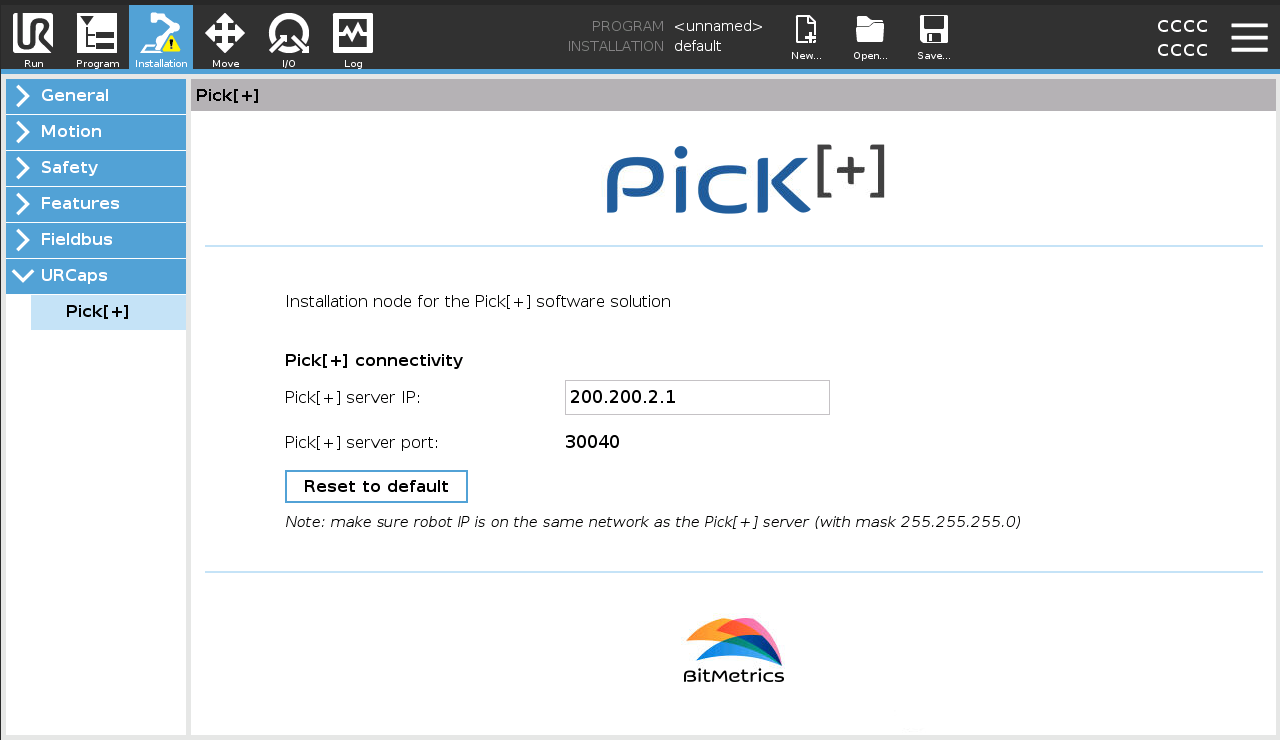
Step 3. URCap - Server IP
The Pick[+] URCap on the robot must know the Server PC's IP address. If you changed the server IP in Step 1, update it here as well:
- On the UR Teach Pendant, go to the Installation tab.
- Navigate to URCaps → Pick[+].
- Set the Pick[+] Server IP to match the Server PC's IP address (default:
200.200.2.1).
Step 4. Pick[+] Software - Advanced Options
The Pick[+] application also stores the Robot and Server IP addresses. These must match the values configured in the previous steps:
- Open Pick[+] and go to Settings Manager.
- Under Robot → Advanced options, open the Communications section.
-
Verify or update:
- Robot IP:
200.200.2.2(must match the robot's IP from Step 2) - Server IP:
200.200.2.1(must match the PC's IP from Step 1)
- Robot IP:
-
Click Save Changes.
For more details on the Settings page, see Settings Manager.
Optional: External Client PC
When using a separate PC as the Pick[+] Client (e.g. with a Jetson setup), configure its Ethernet adapter:
- Connect an Ethernet cable from the Client PC to the corresponding port on the Pick[+] Server PC.
-
Set the following static IP configuration on the Client PC:
- IP Address:
200.200.1.1(or another unused address in200.200.1.x) - Subnet Mask:
255.255.255.0 - Gateway:
200.200.1.100
- IP Address:
If these values do not match, the system will not connect. See Robot Disconnected for troubleshooting steps.